How to Edit an Image in Google Docs (Easiest Way in 2025)
In this tutorial, we will show you exactly how to edit an image in Google Docs in just a few simple steps. Read on to learn more.

How to Edit Images in Google Docs
Follow the steps below to edit images on Google Docs.
1. Insert an Image into the Document
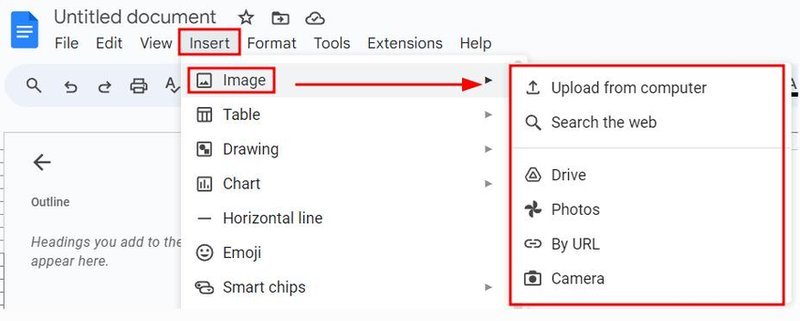
To begin editing, you need an image in your document. Click on “Insert” in the top menu, then select “Image”. Choose the image source (Upload, Drive, Photos, URL, etc.) and insert it into the document where you want it to appear.
2. Click on the Image to Select It
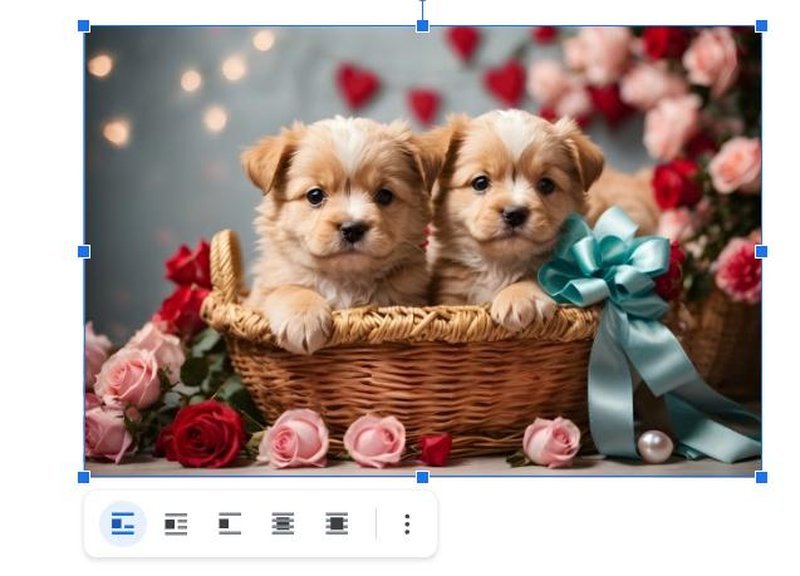
Once the image is in your document, click directly on it. This will select the image and display a toolbar beneath it, showing options for editing and formatting.
3. Resize the Image by Dragging the Corners
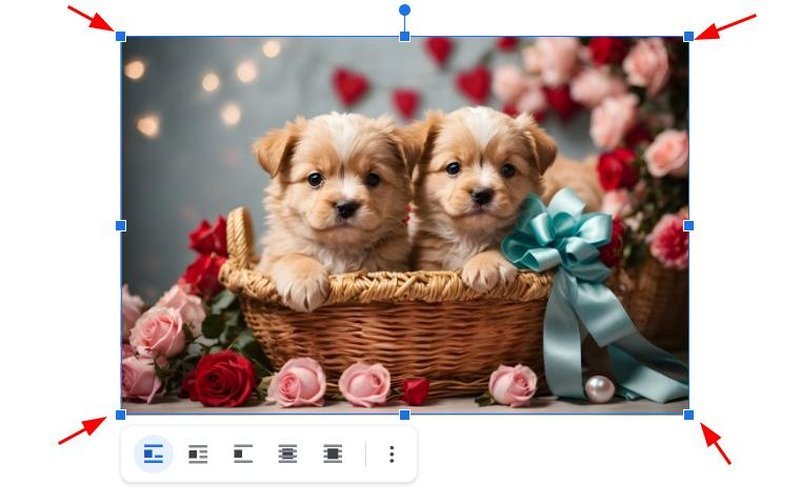
To change the size of the image, click and drag one of the “blue squares” (handles) at the corners. Dragging a corner handle resizes the image proportionally. Release the mouse button when the image reaches the desired size.
4. Crop the Image to Remove Unwanted Parts
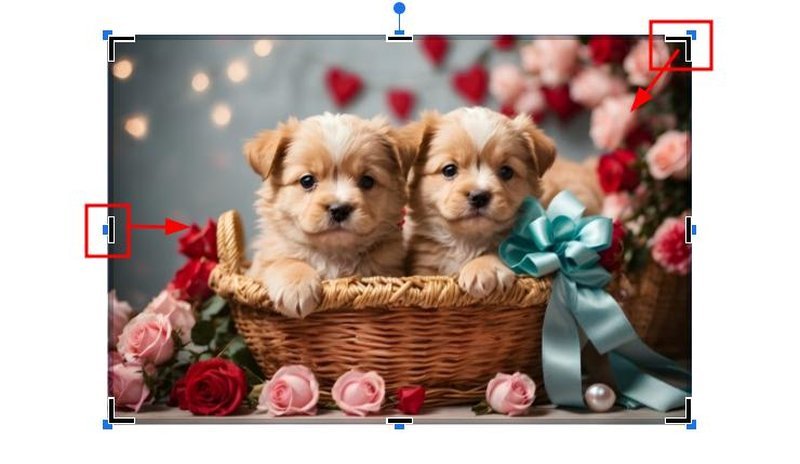
To crop the image, right-click on the image and select the “Crop image” option in the dropdown options.
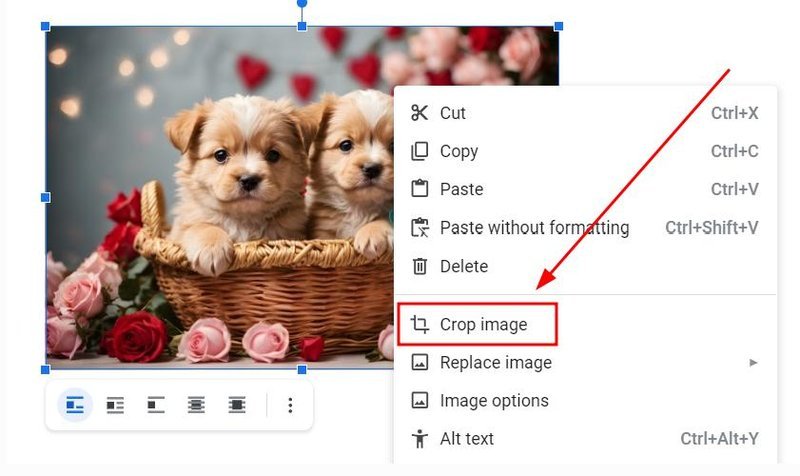
Black bars will show up on the edges of the image. Click and drag these “bars” to crop out the parts of the image you don’t want. Press “Enter” or click outside the image to apply the crop.
5. Adjust Brightness, Contrast, and Transparency
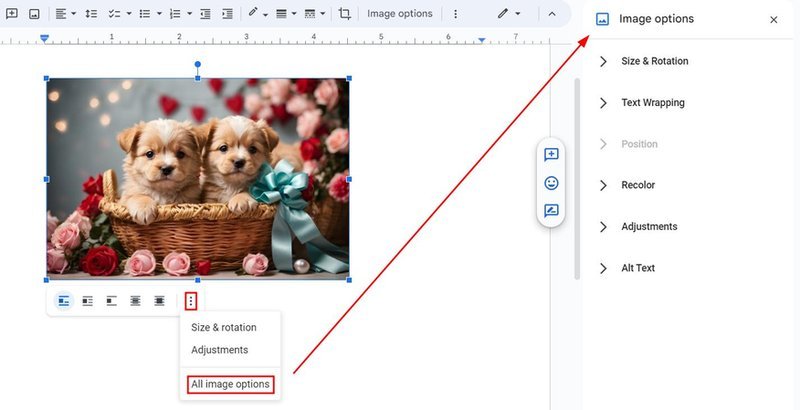
For fine-tuning, click on the “three dots icon” below the image and select “All image options”. Image options button in the toolbar.
This opens a panel on the right where you can adjust brightness, contrast, and transparency, size and text wrapping among others.
6. Wrap Text Around the Image
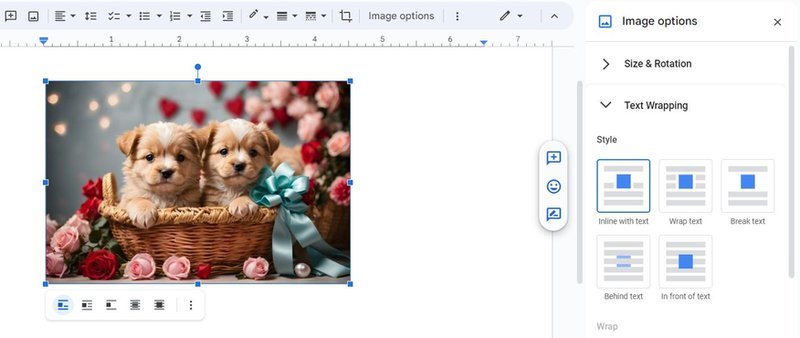
To control how text flows around your image, click on the image and choose a text wrapping option from the toolbar. Options include “Inline,” “Wrap text,” and “Break text.” Select the option that best fits your layout needs.
7. Rotate the Image by Using the Rotation Handle
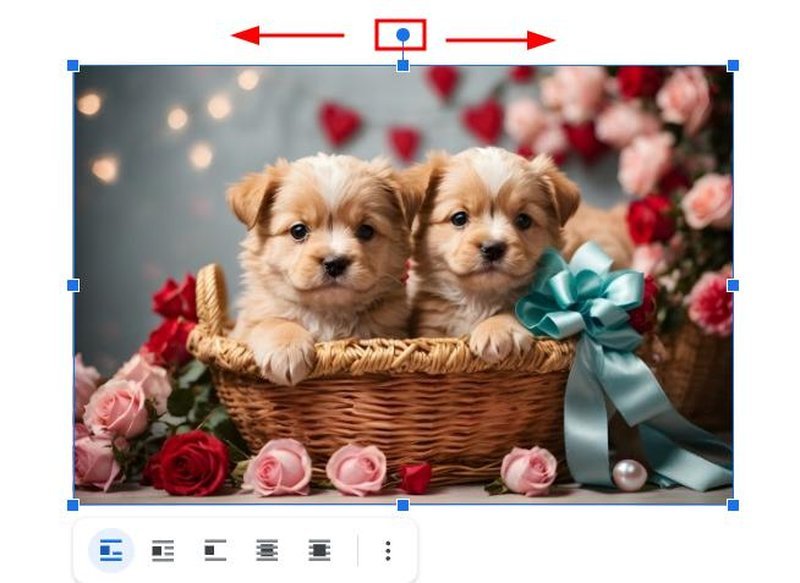
To rotate the image, click on it and locate the “small blue circle” above the image. Click and drag this circle left or right to rotate the image to your desired angle.
8. Replace the Image Without Losing Formatting
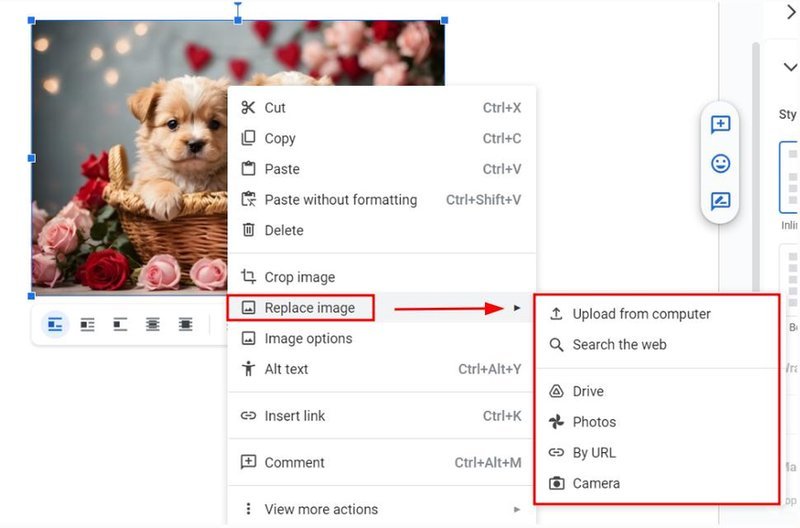
If you need to change the image, right-click on it and select “Replace image” from the menu. You can then choose a new image, which will take the place of the current one while keeping the existing formatting.
9. Delete the Image from the Document
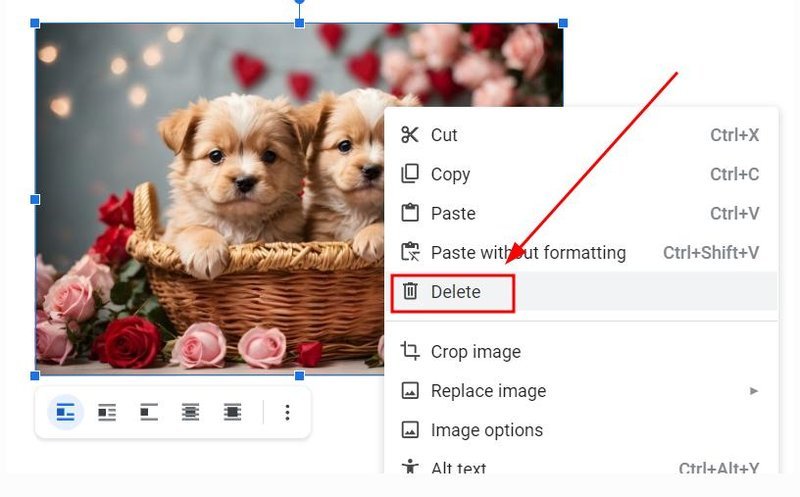
To remove the image, click on it to select it, then press the “Delete” or “Backspace” key on your keyboard. This action will delete the image from your document.
We hope that you now have a better understanding of how to edit images on Google Docs. If you enjoyed this article, you might also like our articles on how to group images on Google Docs and how to wrap an image in Google Docs.


