Can’t Remove Header in Google Docs (How to Fix it in 2025)
In this tutorial, we will show you exactly how to fix a Google Docs header that you can’t remove in just a few simple steps. Read on to learn more.
Removing Header in Google Docs
Follow the steps below to remove a Google Docs header.
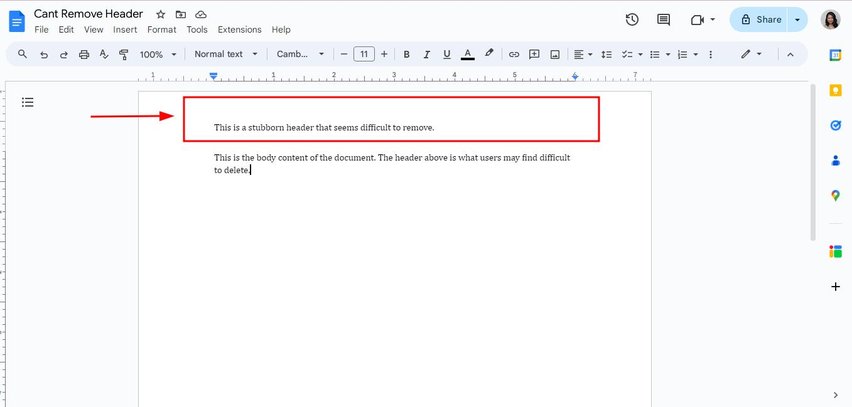
1. Double-Click the Top of the Page to Edit Header
To remove the header, start by double-clicking at the top of the page area. This will open the header section, allowing you to make changes.
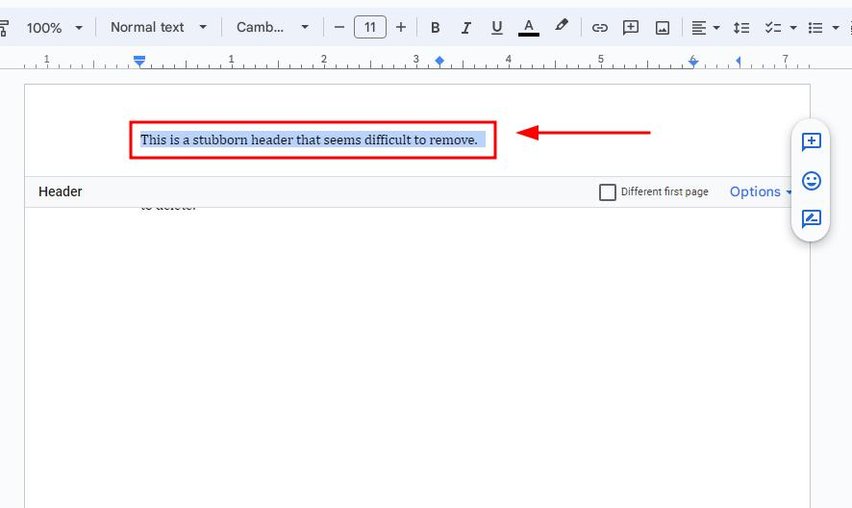
2. Highlight All Text or Elements in the Header
Once in the header section, click and drag your cursor over all the text or elements. This selects everything in the header for easy removal.
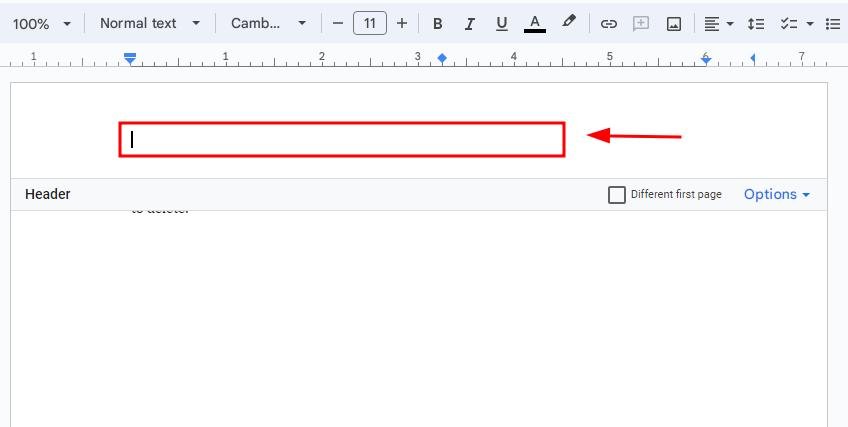
3. Press Delete or Backspace to Remove Header Content
With everything highlighted, press the “Delete” or “Backspace” key. This will remove all content within the header. Here, you can see that the content of the header is now deleted.
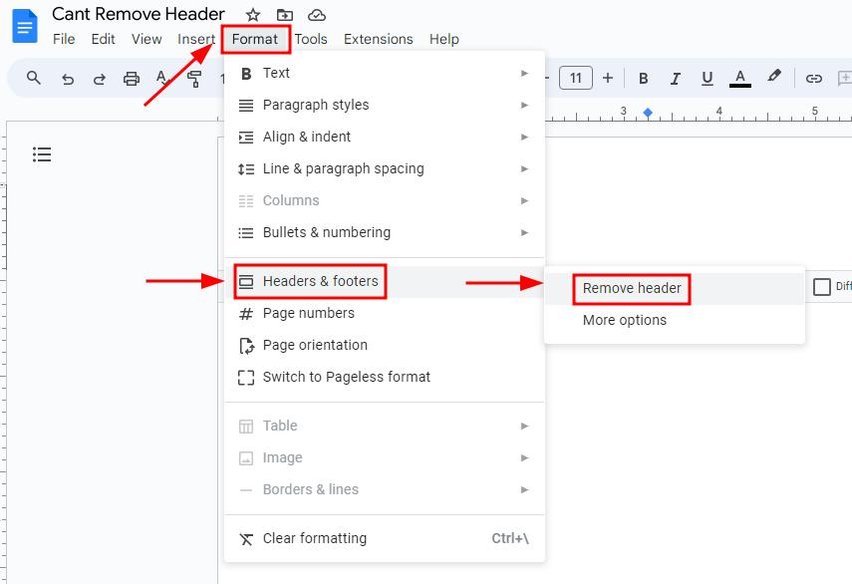
4. Go to Format Menu to Access Header Settings
If there’s still space left after deleting the content, click “Format” in the menu. Then select “Headers & Footers” and click on “Remove header.”
5. Set Header Margin Value to Zero to Remove Space
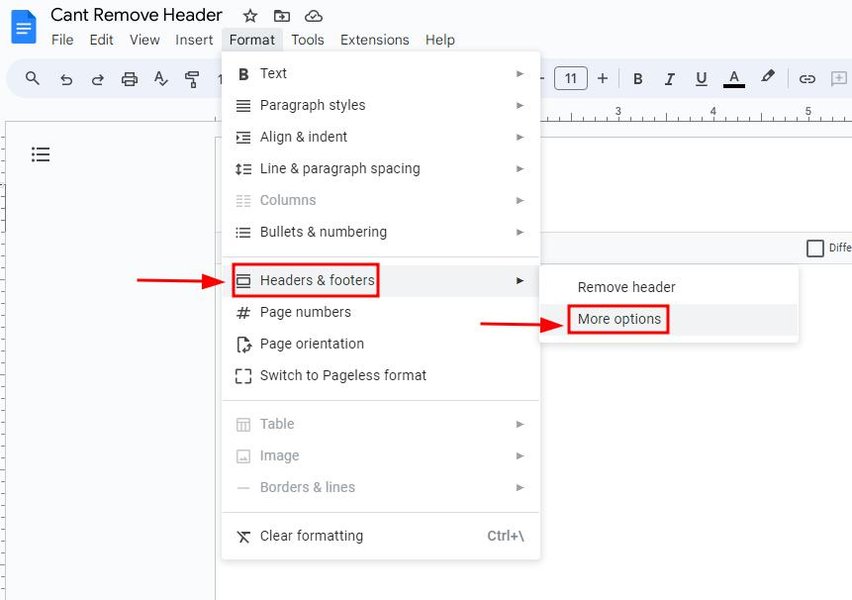
Under “Headers & Footers”, click on “More option.”
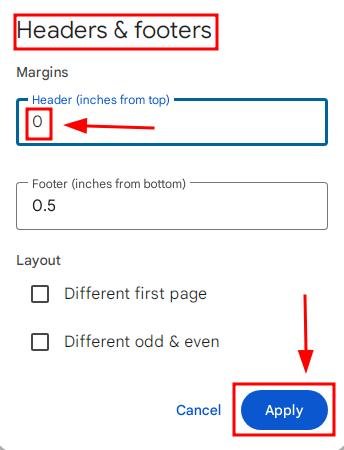
In the “Headers & Footers” settings, find the margin box labeled “Header.” Set this value to 0 to ensure there’s no leftover space from the header. Once done, click “Apply.”
6. Scroll Through Document to Confirm Header is Removed
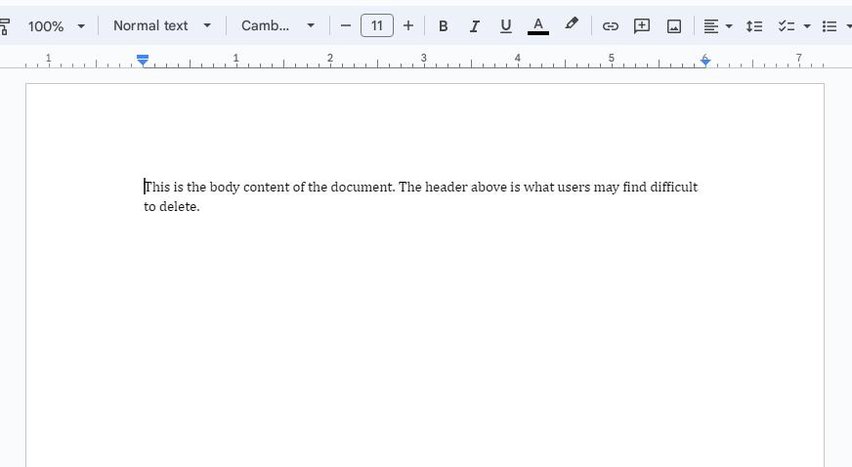
Scroll through the entire document to ensure you have completely removed the header. Check each page for any remaining text or space at the top. In our example, we have removed the header successfully.
We hope that you now have a better understanding of removing a Google Docs header. If you enjoyed this article, you might want to check our articles on how to apply an APA header in Google Docs and how to edit header in Google Docs.


