Justified Margins on Google Docs (Easiest Way in 2025)
In this article, we will show you how to make justified margins on Google Docs. Simply follow the steps below.
Set Justified Margins on Google Docs
To make justified margins on Google Docs, simply follow the process below.
1. Select the Text
Click and drag your cursor over the text you want to justify. If you want to justify all the text in your document, press Ctrl+A (Cmd+A on Mac) to select everything.

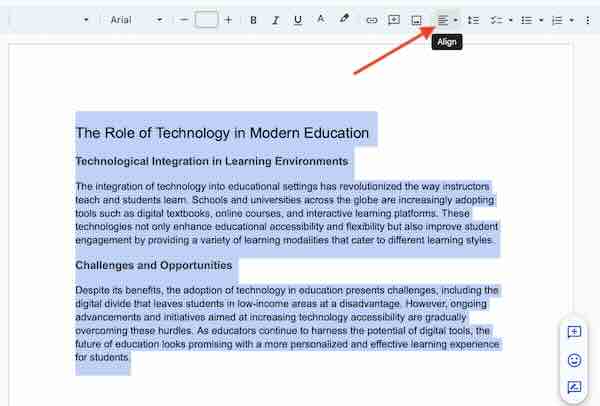
2. Open the Alignment Options
In the toolbar at the top of your Google Docs document, locate the alignment options. These are typically represented by four horizontal lines aligned in different ways.
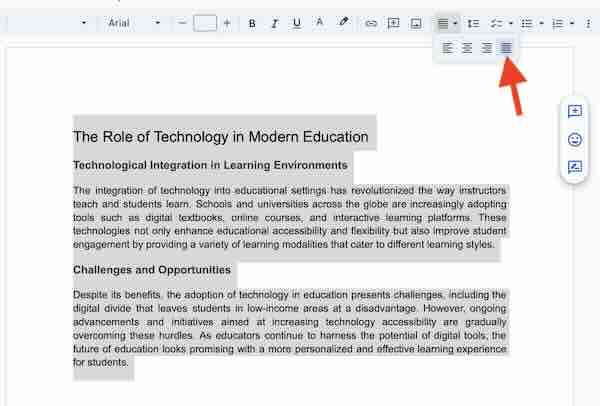
3. Choose Justify
Click on the Justify alignment option, which is represented by four horizontal lines of equal length. This will align the text so that it is evenly distributed across the page that will create justified margins.
4. Verify the Justification
Review your document to ensure the text is justified properly. Check that the left and right margins are evenly aligned.

We hope you now have a better understanding of how to make justified margins on Google Docs. If you enjoyed this article, you might also like our article on how to change vertical margins in Google Docs or our article on how to view margins in Google Docs.