How to Change Text Orientation in Google Docs (2025 Guide)
In this article, we will show you how to change text orientation in Google Docs. Simply follow the steps below.
Change Text Orientation in Google Docs
To change the text orientation in Google Docs, we will use an example word, “Creativity.” Follow the steps below:
1. Access the Drawing Tool via the “Insert” Menu
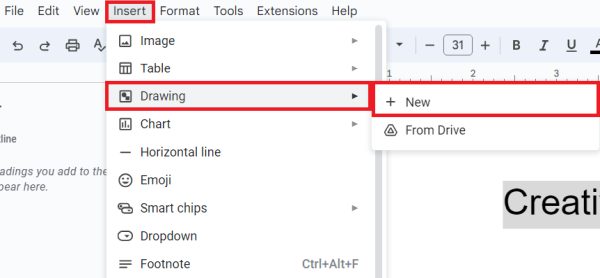
Go to the Insert menu at the top of the page. In the dropdown menu, hover over Drawing and then click on + New. This will open a new drawing window where you can create and modify drawings.
2. Create a Text Box in the Drawing Tool
In the drawing tool, find and click on the Text box icon, which looks like a square with a ‘T’ inside it.
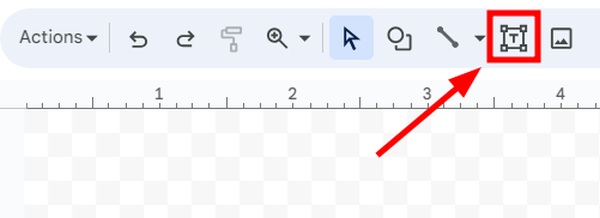
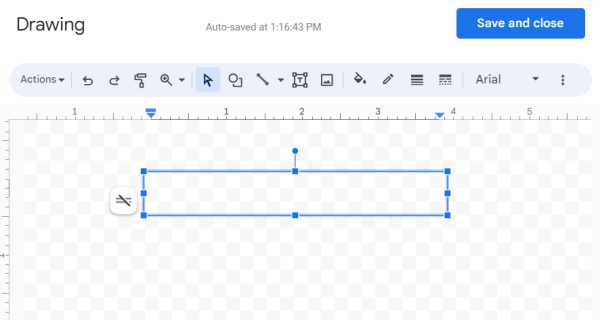
Then, click and drag your cursor in the drawing area to create a text box of the desired size.
3. Type Your Text into the Text Box
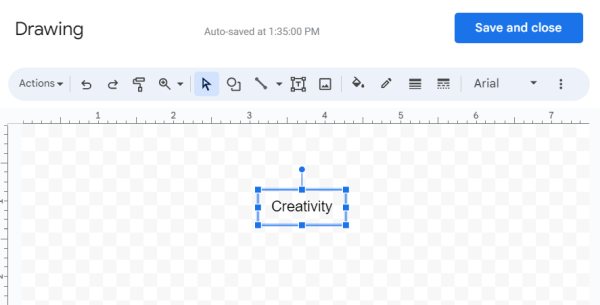
Click inside the text box you just created. Then, type the text whose orientation you want to change. In our example, we will use the word ‘Creativity.’
4. Use the Blue Handle to Rotate the Text Box to Your Desired Angle
Click on the blue handle at the top of the text box. This handle lets you rotate the text box.
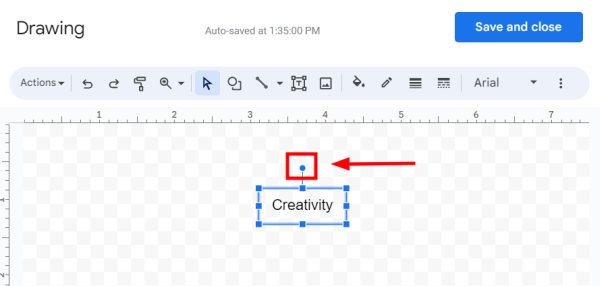
Click and drag the handle to rotate the text to your preferred angle. For example, let’s rotate the word ‘Creativity’ counterclockwise to a vertical position. Release the handle once the text is correctly oriented.
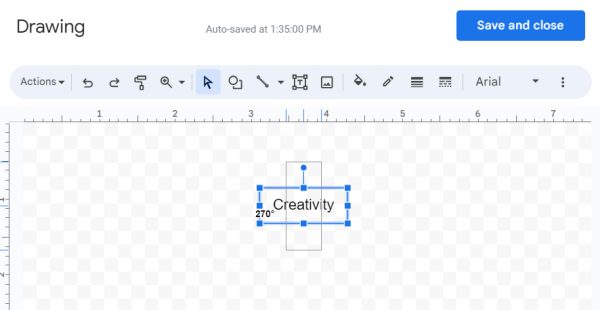
5. Click “Save and Close” to Insert the Rotated Text Back into Your Document
Once you are satisfied with the text orientation, click the Save and Close button at the top right corner of the drawing window.
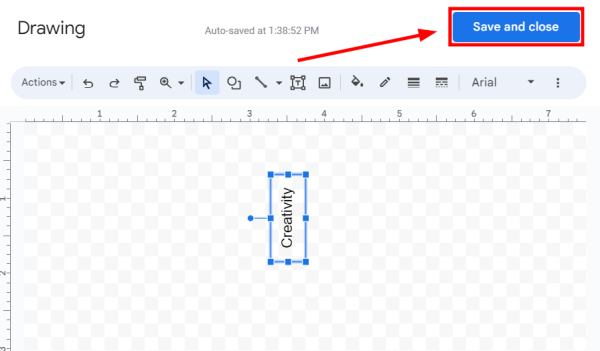
This action will insert the drawing with the rotated text back into your Google Docs document.

We hope that you now have a better understanding of how to change text orientation in Google Docs. If you enjoyed this article, you might also like our article on how to place a border around text in Google Docs or our article on how to convert an image to text in Google Docs.


