How to Show Margins in Google Docs (Easiest Way in 2025)
In this tutorial, we will show you exactly how to show margins in Google Docs in just a few simple steps. Read on to learn more.

Show Margins in Google Docs
Follow the steps below to show margins on Google Docs.
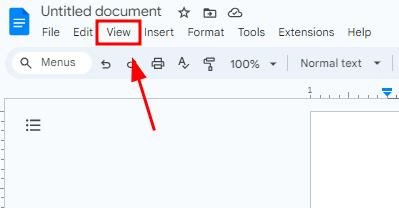
1. Click the “View” Menu to Access Display Options
To see the margins in Google Docs, you need to enable the ruler. Start by clicking on the “View” menu at the top of your Google Docs window to find the necessary display options.
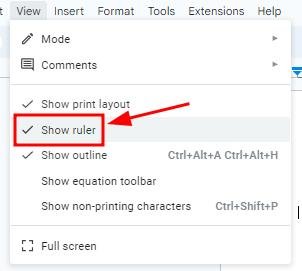
2. Click the “Show Ruler” Option
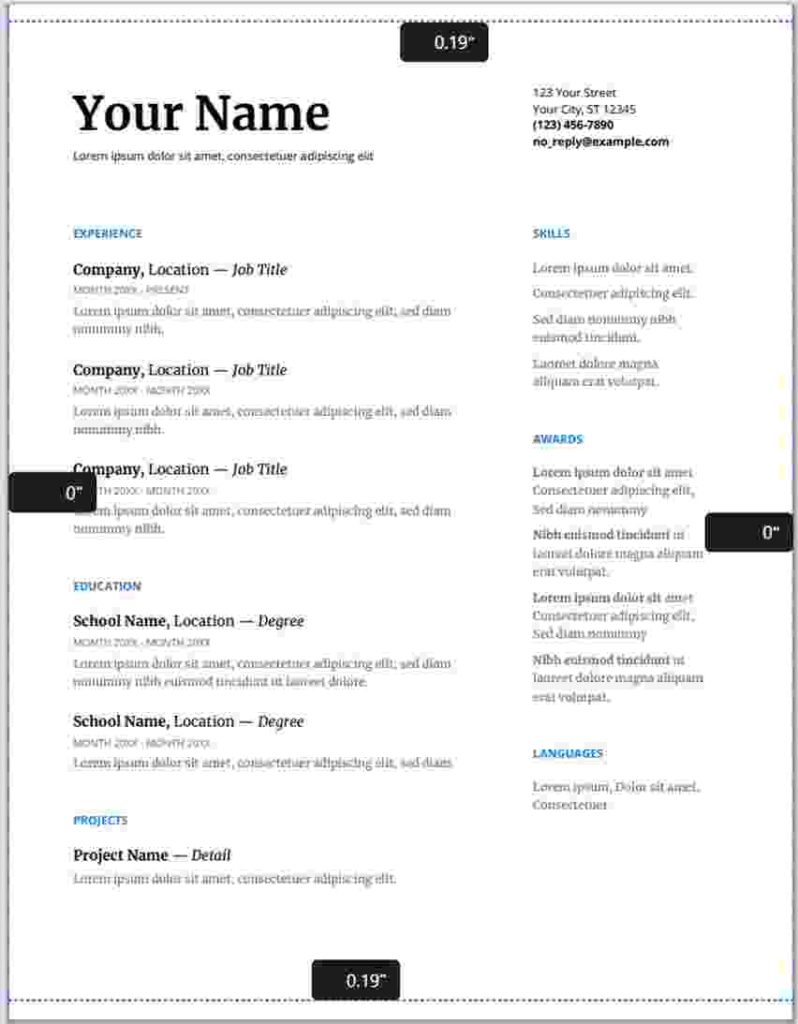
In the “View” menu, click on “Show ruler.” This will make a horizontal ruler appear at the top of your document and a vertical ruler at the left, showing where the margins are set.
3. Click “Print Layout” in the “View” Menu to Ensure Margins Are Visible
Go to the “View” menu again and select “Print layout.”
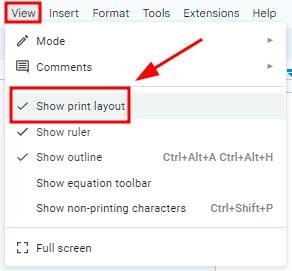
This view shows the document as it would appear when printed, including the visible margins on all sides.
We hope that you now have a better understanding of how to show the margins of your Google Docs. If you enjoyed this article, you might also like our articles on what to do when the margins in your Google Docs are not working and how to put MLA margins in your Google Docs.