How to Put Bullet Points Side by Side in Google Docs (2025)
In this article, we will show you exactly how to put bullet points side by side in Google Docs. Simply follow the steps below.

Bullet Points Side by Side in Google Docs
Follow the steps below on how to put bullets side by side in Google Docs.
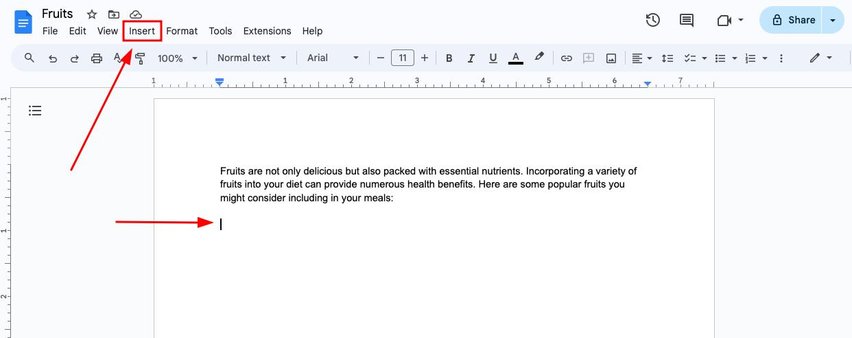
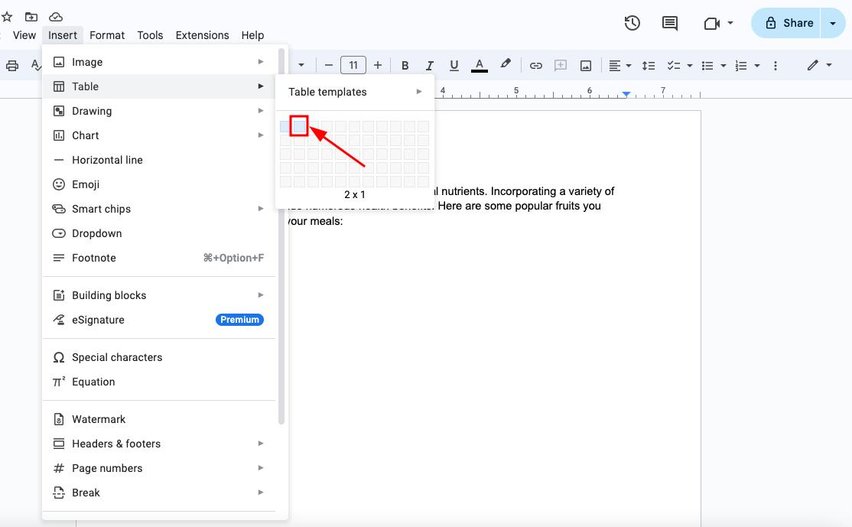
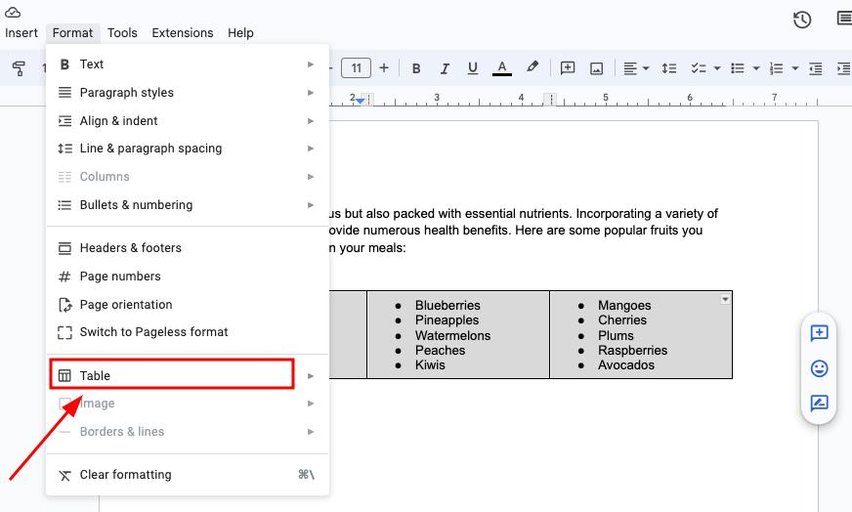
1. Go to the Insert Menu to Create a Table
First, locate where you want to place your bullet list in the document. Then, go to the “Insert” menu in Google Docs. This will allow you to create a structured layout for your bullet points.
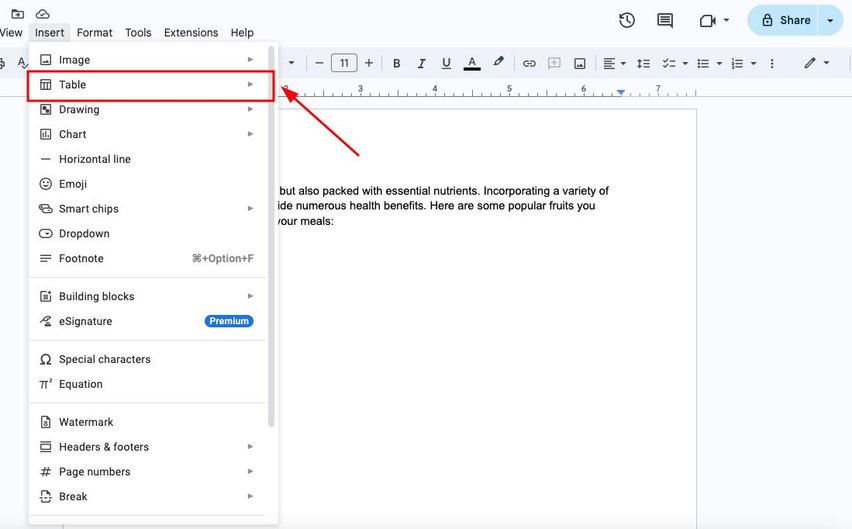
2. Select the Table Option to Insert a Table
From the “Insert” menu, select “Table.” This step enables you to choose how many cells you want for your layout.
3. Choose a Table Size Based on the Number of Columns Needed
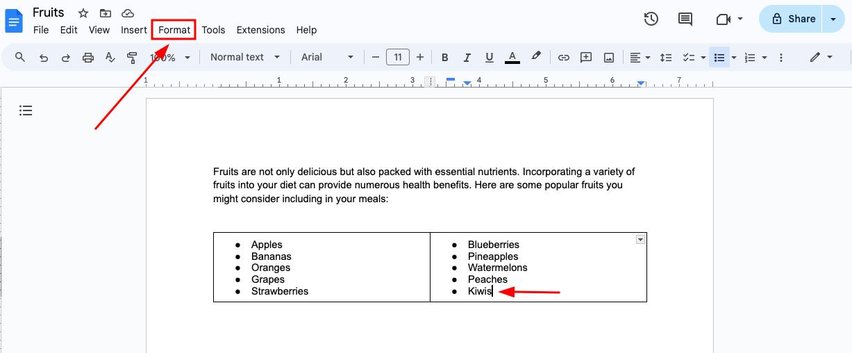
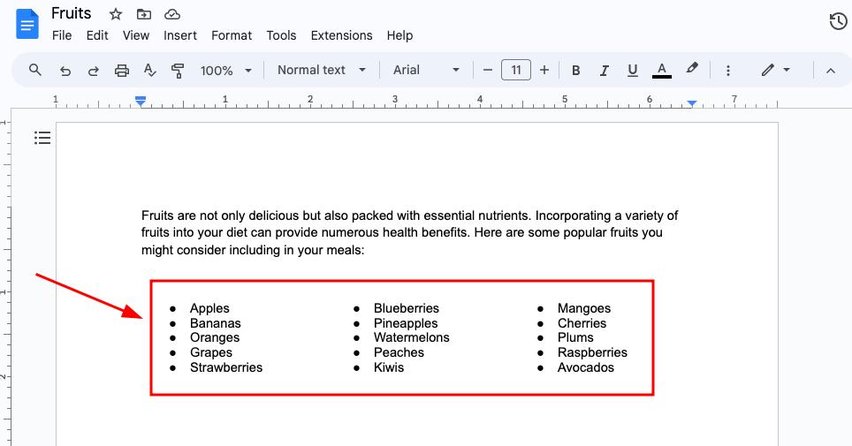
Choose the size of the table depending on the number of columns you want for your bullet lists. In this example, we select a 2×1 table to create two side-by-side lists. If you need 3 columns, select a 3×1 table accordingly.
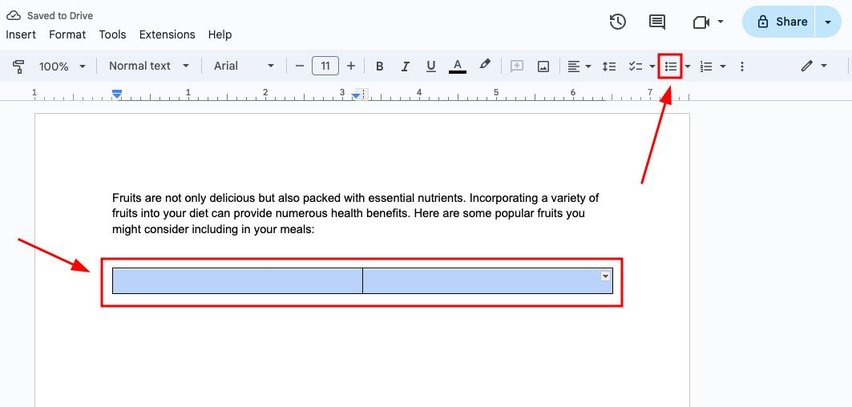
4. Enable Bullet Points for Both Columns in the Table
Select the entire table by clicking and dragging over both cells. Then, click the bulleted icon in the toolbar to enable bullet points for each column. This keeps your content organized and easy to read.
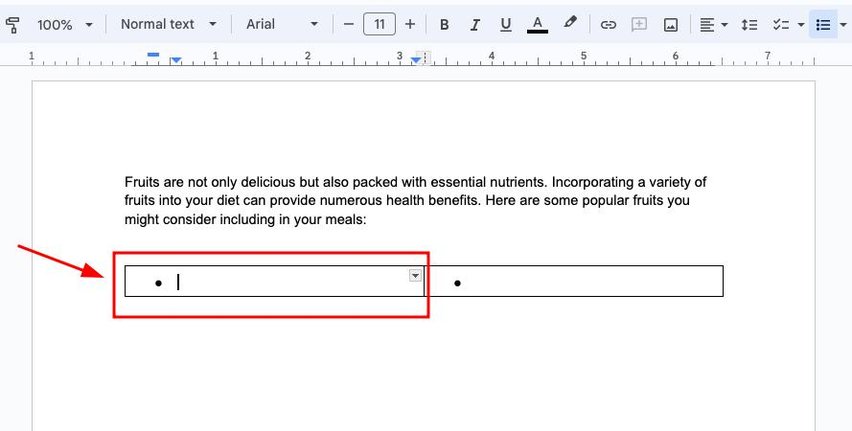
5. Type Your Bullet Points in Each Column
Type your first list of bullet points in the first column.
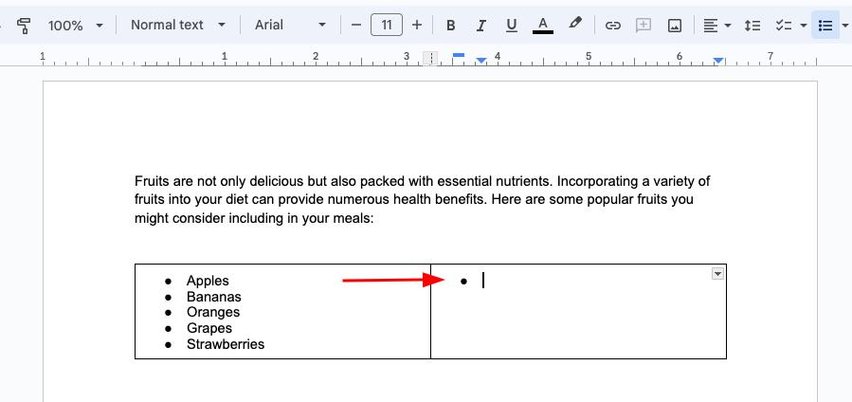
Then, move to the second column and type the rest of your list. This allows for related information to be displayed side by side.
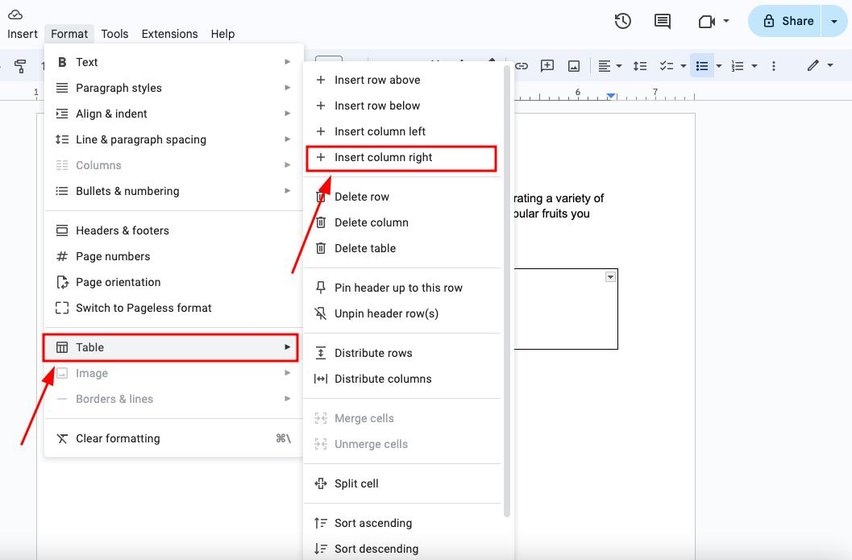
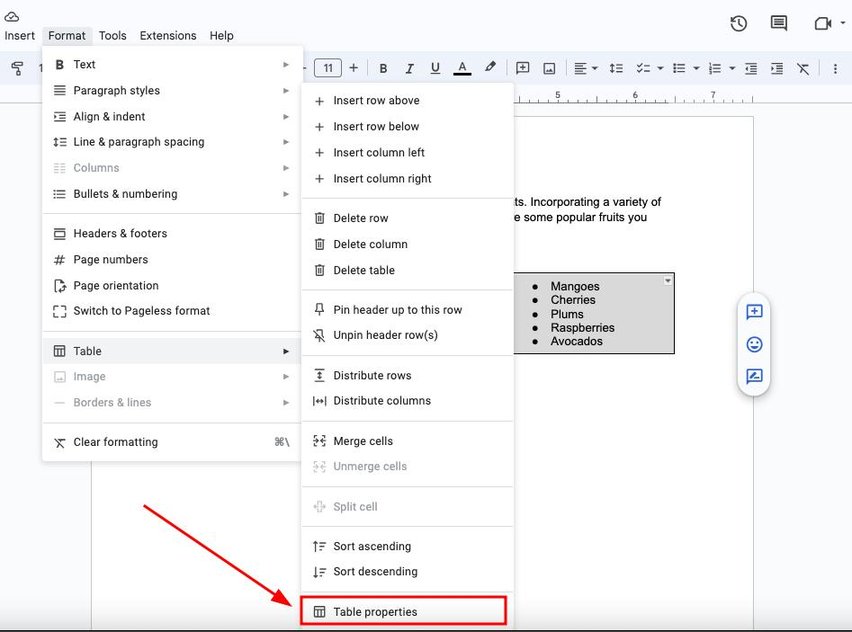
6. Click Inside the Last Column and Open the Format Menu (Optional)
If you want additional columns for more bullet lists, click inside the last column of the table. Then click on “Format” in the top menu to access additional options for table manipulation.
7. (Optional) Insert a New Column and Type Additional Bullet List
Select “Table,” then choose “+ Insert column right.”
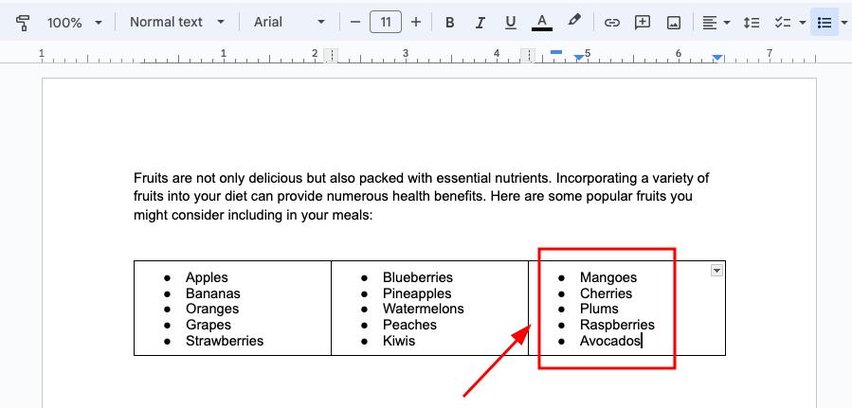
Type in your additional bullet list in the new column. This allows you to expand your layout and include more information.
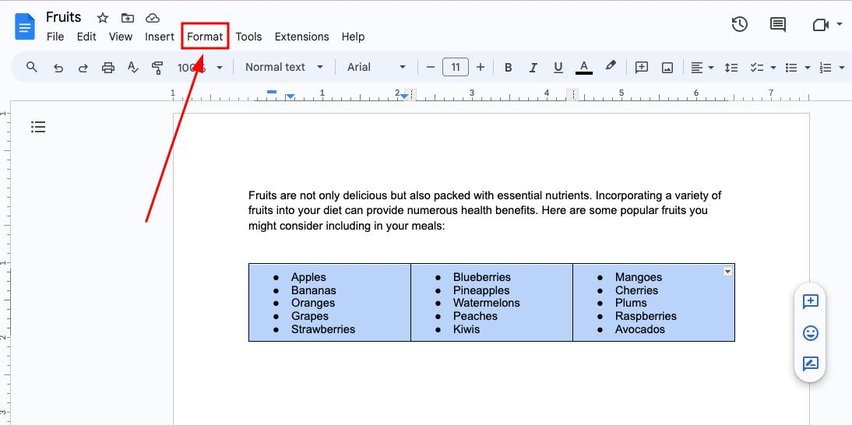
8. Select the Whole Table to Adjust Table Properties
Select the whole table by clicking and dragging over all the cells. This prepares the table for further adjustments.

9. Click the Format Tab to Access Table Formatting Options
In the top menu, click on the “Format” tab to access formatting options.
10. Hover Over the Table Option to See More Menu Choices
From the drop-down menu, hover over “Table” to reveal more options.
11. Click Table Properties to Customize Your Table
Select “Table properties” from the menu. This opens a dialog box for table customization.
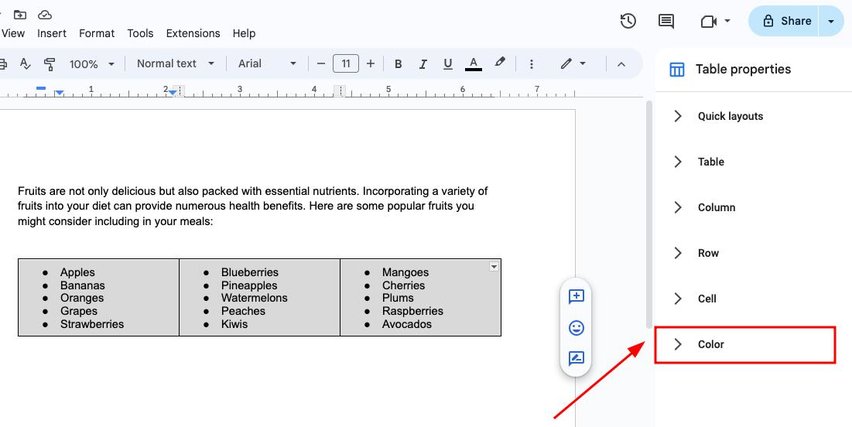
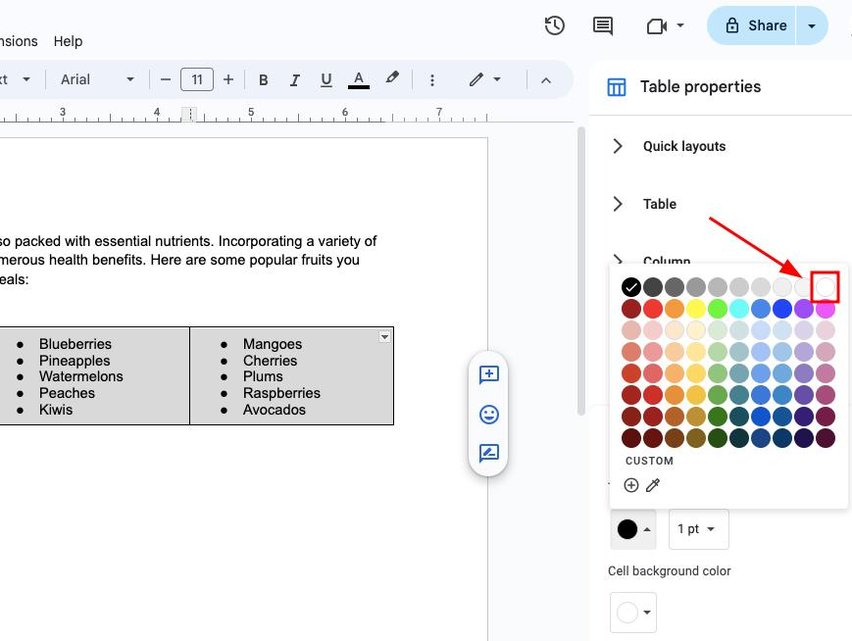
12. Look for the Color Section in Table Properties
In the Table Properties dialog, look for the “Color” section to customize your table’s appearance.
13. Change the Table Border Color for a Clean Look
Find the option for “Table border color.” This allows you to change the border settings of your table.
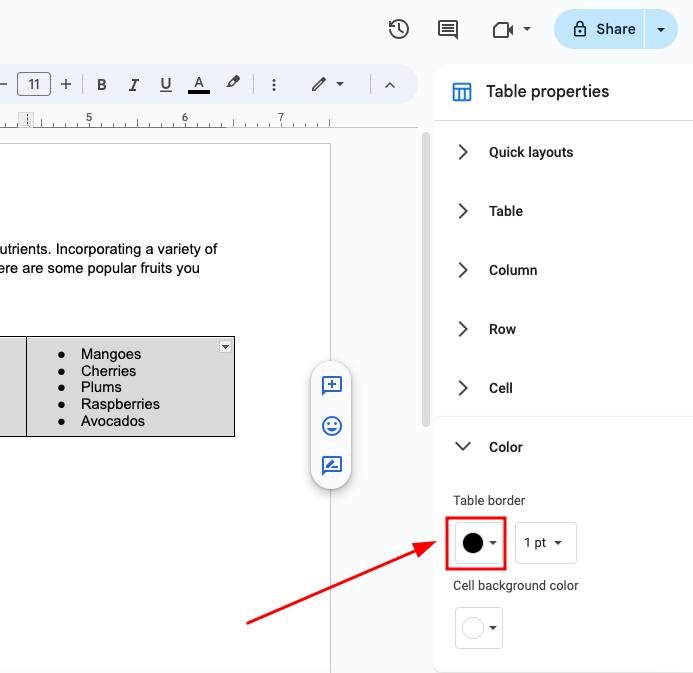
14. Choose White as the Border Color to Hide Table Lines
Select “White” as the border color. This will hide the table lines, creating a clean look for your bullet points. Without the borders, your bullet lists will appear seamlessly integrated into the document.
Without the borders, your bullet lists will appear seamlessly integrated into the document.
We hope that you now have a better understanding of how to do side by side bullets in Google Docs. If you enjoyed this article, you might also like our article on how to customize bullet points in Google Docs.