How to Link the Table of Contents to Pages in Google Docs (2025)
In this article, we will show you how to link the table of contents to pages in Google Docs. Simply follow the steps below.
Link the Table of Contents to Pages
Follow the steps below to link the table of contents to pages in Google Docs.
1. Format Section Titles with Heading Styles
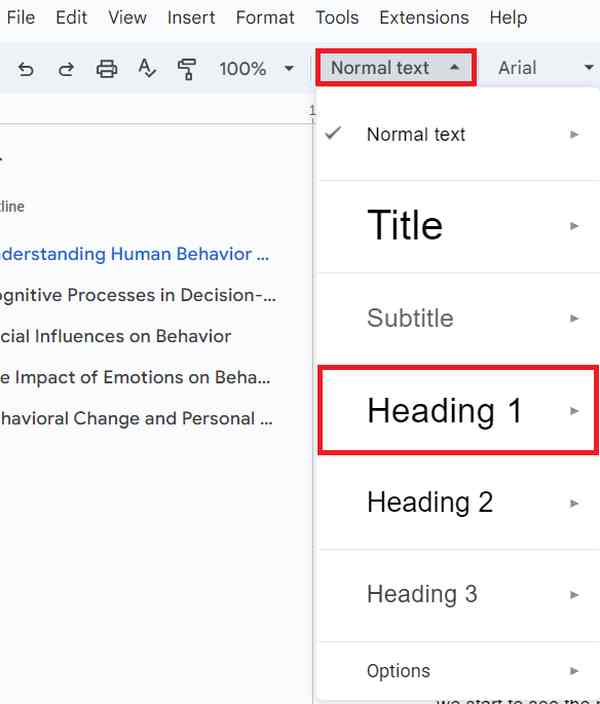
Ensure each section title in your document is formatted as a heading. To do this, highlight the text for each section title (e.g., “Introduction to Human Behavior,” “Cognitive Processes in Decision Making”).

Then, go to the ‘Styles’ menu located at the top left of the toolbar, usually displayed as Normal text. Click on it and select the appropriate heading style, such as Heading 1 for the main sections.

2. Insert the Table of Contents at the Desired Location
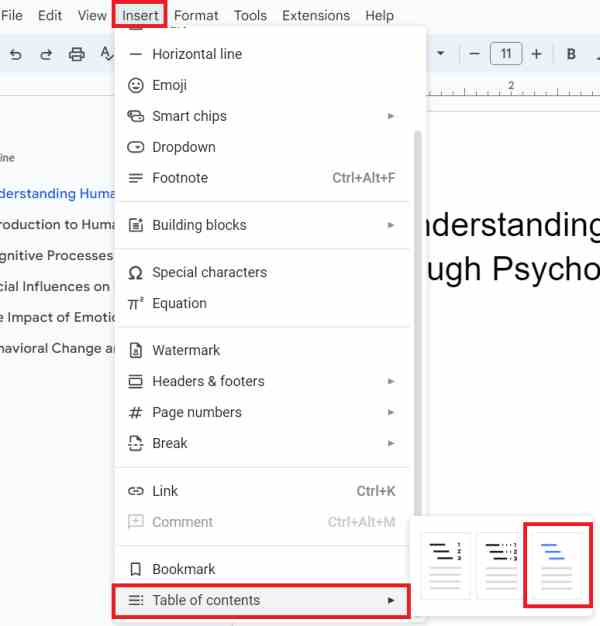
Decide where you want the Table of Contents to appear in your document. In our example, we want it at the beginning of the document. Place your cursor at this location.

Next, click on the Insert menu at the top of the page. From the dropdown menu, select Table of contents. You will see options for different styles. Choose the style with links.

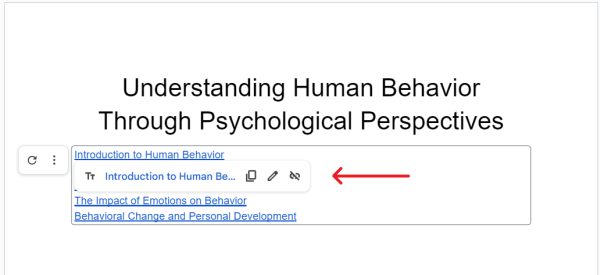
The Table of Contents will be inserted at the cursor’s location, displaying a list of your formatted headings with clickable links.

3. Verify the Links in the Table of Contents
After updating the Table of Contents, verify that each item links correctly to the corresponding section in the document. Click on each item in the Table of Contents to ensure it takes you to the correct section.

We hope that you now have a better understanding of how to link the table of contents to pages in Google Docs. If you enjoyed this article, you might also like our article on how to change the orientation of one page in Google Docs or our article on how to link to a specific part of a page in Google Docs.


