How to Insert Vertical Line Between Words in Google Docs (2025)
In this tutorial, we will show you exactly how to insert a vertical line between words in Google Docs. Simply follow the steps below.

Add a Vertical Line Between Words in Google Docs
Follow the steps below to add a vertical line between words in your Google Docs.
1. Use the “Drawing” Tool for Custom Lines
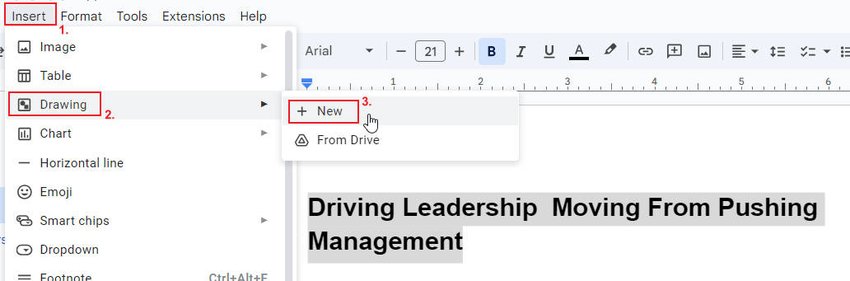
In this example, we want a modern look for the title “Driving Leadership; Moving From Pushing Management.” We’ll replace the semicolon with a vertical line for a cleaner appearance.
To do this, open the “Insert” menu, select “Drawing”, and click “+ New” to open the Drawing window.
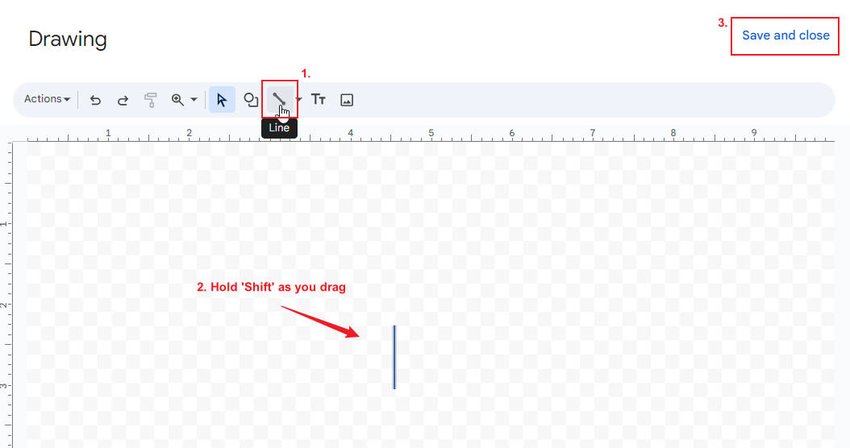
Select the “Line tool” and draw a vertical line by holding “Shift” as you drag. Shift will keep the line straight. Once done, click “Save and close” to add the line to your document.
Position the line between your chosen words by dragging it to the desired spot. You may need to resize or adjust its position for perfect alignment.

2. Use the Keyboard Shortcut for Vertical Bar ( | ) Symbol
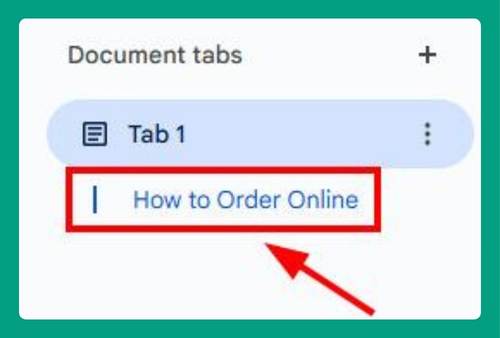
A quick way to add a vertical line between words is to use the vertical bar symbol. Place your cursor between the words where you want the line, then press “Shift + Backslash ( \ )” on your keyboard. The “|” symbol will appear. Adjust the font size if needed for better visibility.

We hope that you now have a better understanding of how to insert a vertical line between words on Google Docs. If you enjoyed this article, you might also like our article on how to make a vertical line in Google Docs.