How to Rotate Words in Google Docs (Easiest Way in 2025)
In this article, we will show you how to rotate words in Google Docs in just a few simple steps. Simply follow the steps below.

How to Rotate Words on Google Docs
Follow the steps below to rotate words in Google Docs.
1. Start a New Drawing to Rotate the Text
To manipulate text orientation, initiate a new drawing. Go to `Insert` in the top menu, choose `Drawing`, then select `+ New`. This will open a new drawing canvas, as text rotation is not available directly in the main document editor.

2. Type ‘Innovate’ in a New Text Box within the Drawing
Once in the drawing tool, locate and click the `Text box` icon (resembles a “T” in a box) in the drawing toolbar.

Drag across the canvas to create a text box. In our example, we will type “Innovate.” This step allows you to enter and format text within the drawing.

3. Rotate the Text Box to Change the Orientation of ‘Innovate’
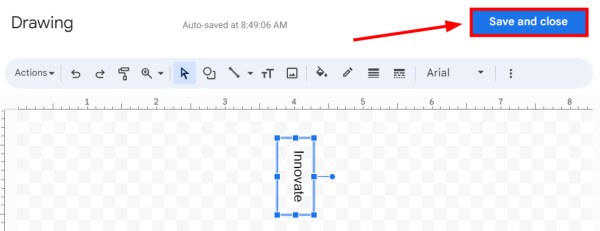
To rotate the text, select the text box by clicking on it. You will notice a blue rotation handle (small blue dot) appearing above the text box.

Click on this handle and drag it in a circular motion to rotate your word to your desired angle.

4. Save and Insert the Rotated Text into Your Document
After rotating the text to the preferred orientation, finalize your drawing by clicking the `Save and Close` button located at the top right of the drawing panel.

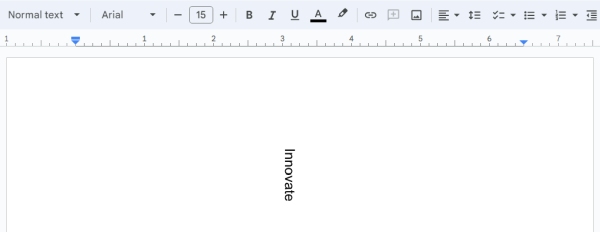
This action inserts the rotated text box containing “Innovate” into your main document.

We hope that you now have a better understanding of how you can rotate words in Google Docs. If you enjoyed this article, you might also like our article on how to circle words in Google Docs or our article on how to include footnotes in word count Google Docs.


