How to Print Poster Size in Google Docs (Easiest Way in 2025)
In this article, we will show you how to print poster size in Google Docs. Simply follow the steps below.
Print Poster Size in Google Docs
To print poster size in Google Docs, we’ll use an example document titled “EDUCATION.”
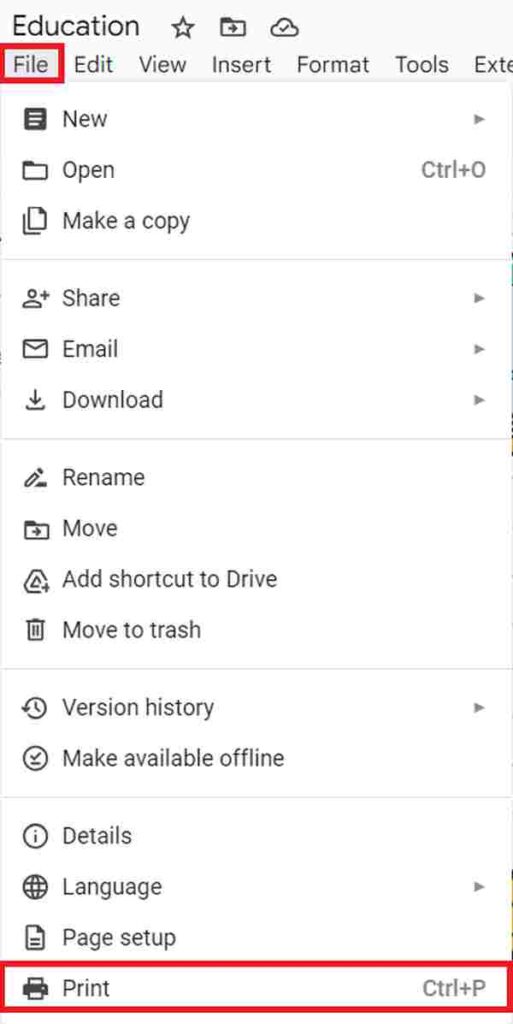
1. Navigate to ‘File’ and Select ‘Print’ to Open Print Settings
Access printing options by clicking ‘File’ in the top left corner, then select ‘Print’. This opens a new window displaying the print preview.

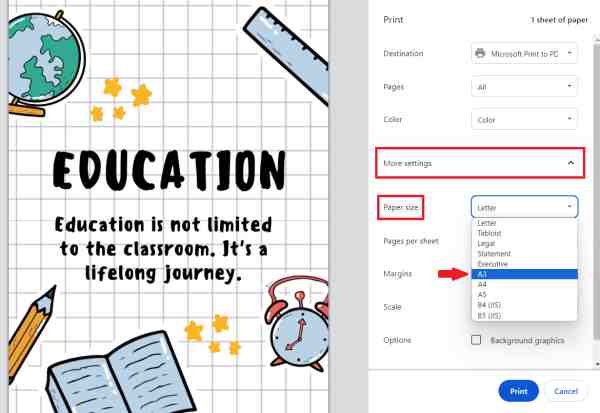
2. Select a Poster-Suitable Paper Size from the ‘Paper Size’ Dropdown
Within ‘More settings,’ locate the ‘Paper size’ dropdown and select a larger size appropriate for posters. For example, we will choose the ‘A3’ paper size.

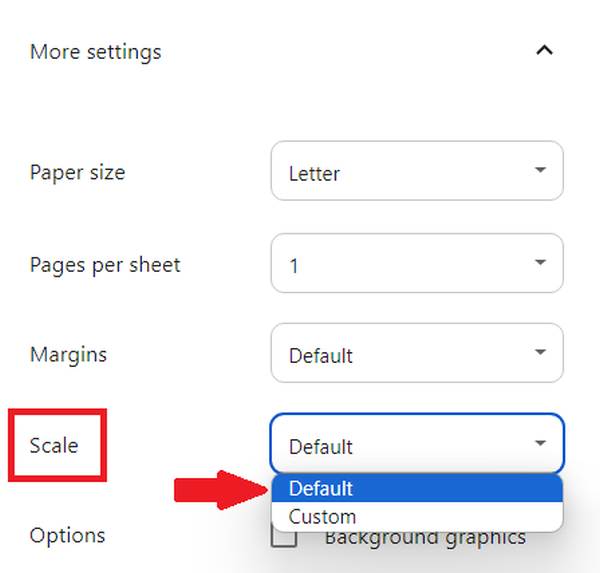
3. Adjust the Document Scale to Fit the Poster Size
Within the ‘More settings’ in the print preview, locate the ‘Scale’ option. If your document has already been formatted to fit the desired poster size within Google Docs, choose ‘Default’ to maintain this scale.

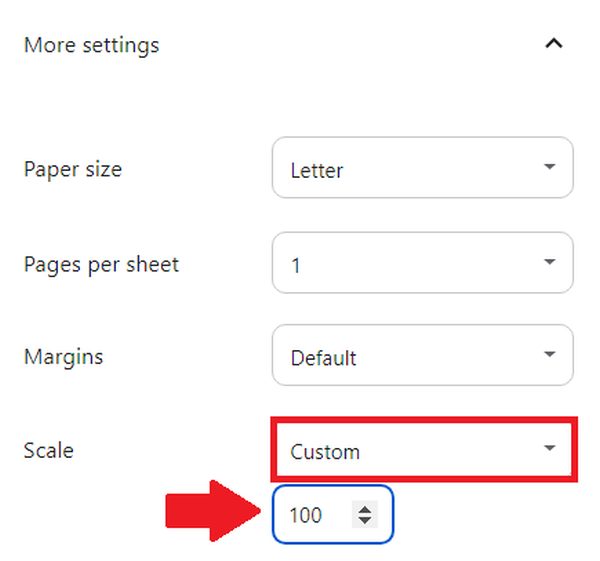
However, if you need to adjust the size further to better utilize the poster space, select ‘Custom’ and manually enter a higher percentage to zoom in and enlarge the document.

4. Print the Full Poster on the Selected Paper Size
Ensure your printer is loaded with the correct paper size. Select ‘print’ to print your poster.

We hope that you now have a better understanding of how to print poster size in Google Docs. If you enjoyed this article, you might also like our article on how to print in color Google Docs or our article on how to show non-printing characters in Google Docs.


