How to Print in Color on Google Docs (Easiest Way in 2025)
In this article, we will show you how to print in color in Google Docs. Simply follow the steps below.
Print in Color in Google Docs
To print in color in Google Docs, we will use an example document titled “A Quick Guide to Bulgaria,” which contains a colored image.
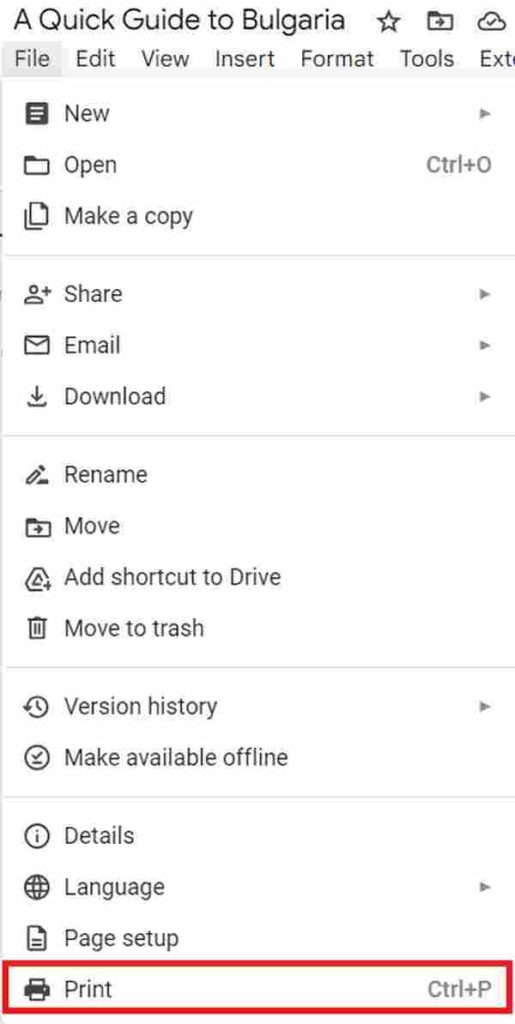
1. Navigate to the ‘File’ Menu at the Top Left Corner
To access document management options, navigate to the File menu at the top left corner of the Google Docs interface. Click on this menu to expand it.

2. Choose ‘Print’ from the File Menu Options
To initiate printing for any document, you should select the Print option from the File menu. This action opens a print settings window where you can see a preview and adjust settings.

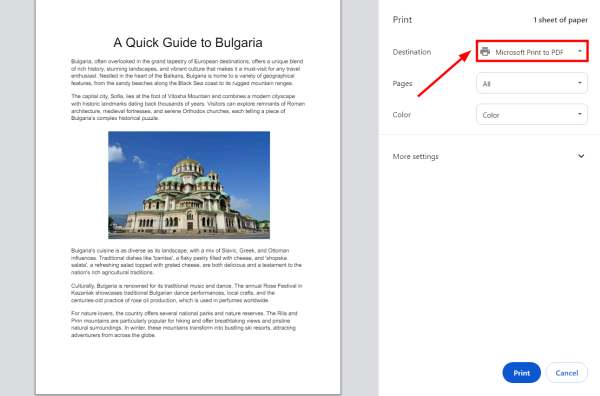
3. Select Your Printer from the Printer Settings Dropdown
In the print settings window, locate the Destination dropdown to choose from available printers. Select one that supports color printing.

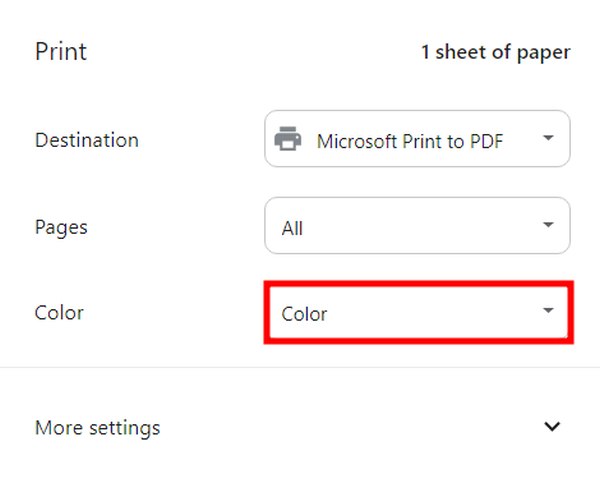
4. Set the Printer to Color Mode
Once you have selected your printer, locate the option within the printer settings to choose between printing in black and white or in color. Select the Color option if it is not already selected. This ensures that any colored text, images, or elements are in your document.

5. Click the ‘Print’ Button to Start Printing Your Document
Once all settings are confirmed and ready, click the Print button to send your document to the printer. Make sure your printer is on and properly set up with enough paper and ink.
We hope that you now have a better understanding of how to print in color on Google Docs. If you enjoyed this article, you might also like our article on how to print Google Docs with comments or our article on how to print poster size in Google Docs.


