How to Flip an Image in Google Docs (Easiest Way in 2025)
In this article, we will show you how to flip an image in Google Docs. Simply follow the steps below.
Flip an Image in Google Docs
To flip an image in Google Docs, follow the steps below.
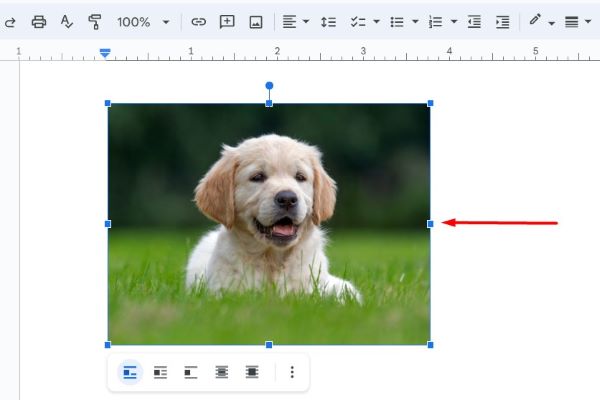
1. Click on the Image to Select It
Click on the image you want to flip. This highlights the image and brings up the image options toolbar. For example, if you have a picture of a dog in your document, click on it to select it.
2. Open the Drawing Tool from the Insert Menu
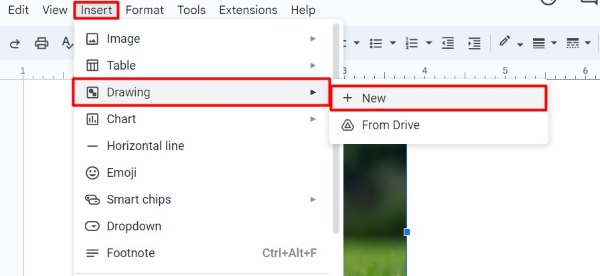
Click on “Insert” in the top menu, then select “Drawing” and choose “New.” This will open the Google Drawing tool in a new window. This tool allows you to edit images. For example, if your dog picture is selected, you need to open the Drawing tool to flip it.
3. Add Your Image to the Drawing Tool
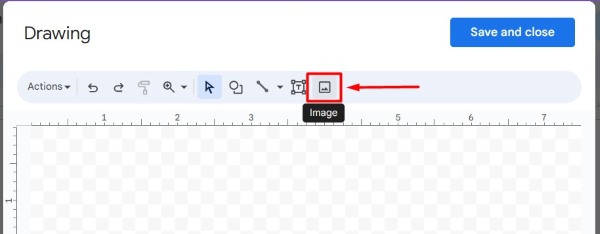
In the Drawing tool, click on the image icon in the toolbar and choose “From Drive” or “Upload” to insert your image.
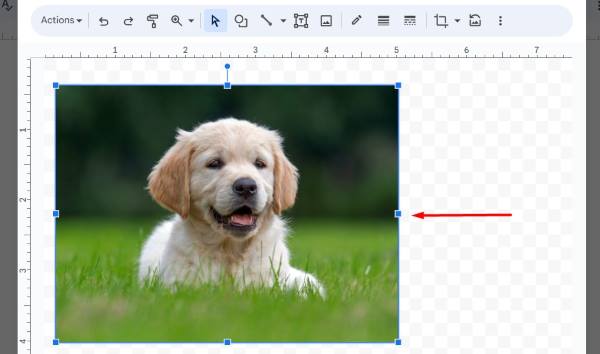
Select the same image you want to flip. For instance, find your dog picture in Google Drive or upload it from your computer.
4. Flip the Image in the Drawing Tool
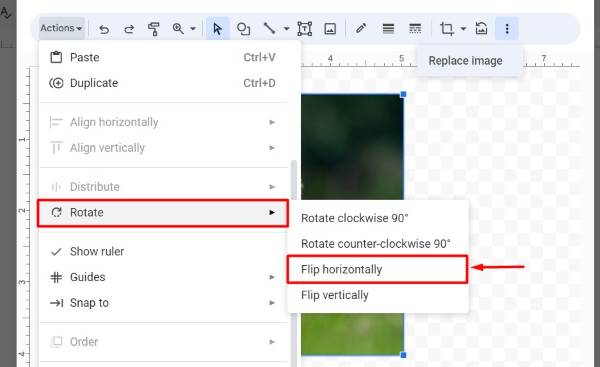
Click on the image in the Drawing tool to select it. Then, click on “Actions” in the top menu, choose “Rotate,” and select either “Flip horizontally” or “Flip vertically.” For example, if you want your dog picture to face the opposite direction, choose “Flip horizontally.”
5. Save and Close the Drawing Tool
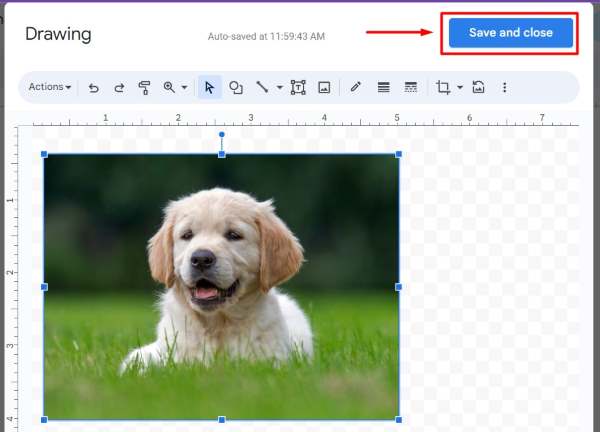
Click “Save and Close” in the top right corner of the Drawing tool.
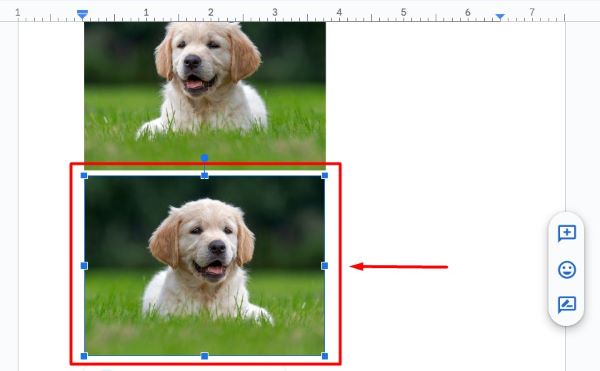
Your flipped image will now appear in your Google Docs document. In this example, your dog picture should now be flipped as you specified.
We hope you now have a better understanding of how to flip an image in Google Docs. If you enjoyed this article, you might also like our article on ways to resize an image in Google Docs or our article on how to crop an image in Google Docs.


