How to Crop an Image in Google Docs (Easiest Way in 2025)
In this article, we will show you how to crop an image in Google Docs. Simply follow the steps below.
Crop an Image in Google Docs
To crop an image in Google Docs, follow the steps below.
1. Insert an Image into Your Document
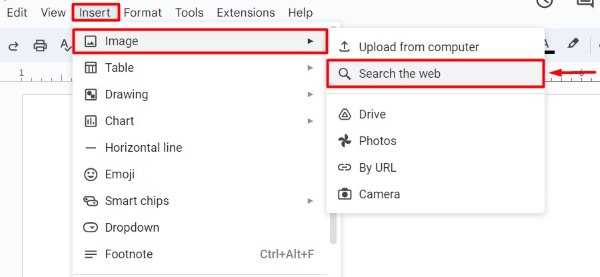
To start, insert an image into your Google Docs document. Click on “Insert” in the top menu, then select “Image.” Choose “Search the web” to find an image online.
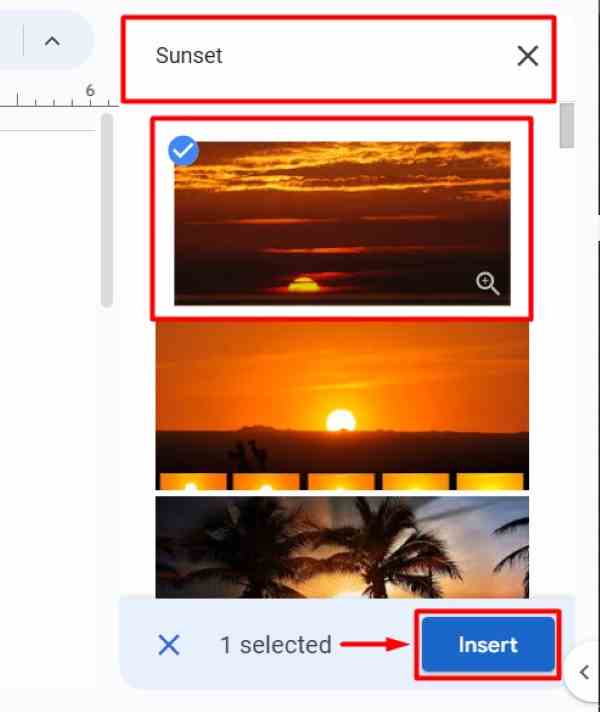
For example, you might insert a picture of a sunset, type “Sunset” on the search bar. After selecting the picture, click “Insert.”
2. Click on the Image to Select It
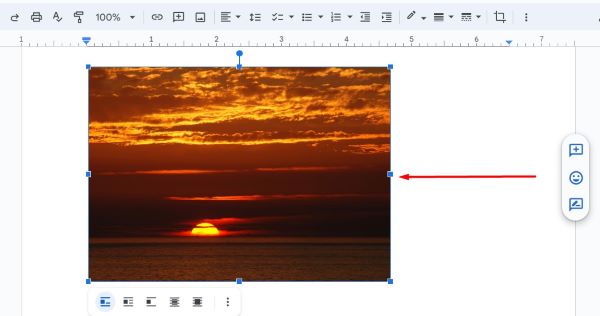
Click on the image you inserted. This will highlight the image with a blue border and show the image editing toolbar below it. For instance, if you inserted a sunset image, clicking on it will highlight it, allowing you to edit.
3. Click the Crop Icon in the Toolbar
In the image editing toolbar, click on the crop icon. This icon looks like a small square with diagonal lines extending from its corners. Clicking this icon will enable the crop feature, allowing you to modify the image.

4. Drag the Black Bars to Adjust the Crop Area
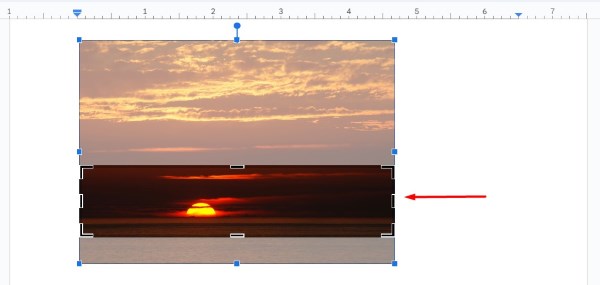
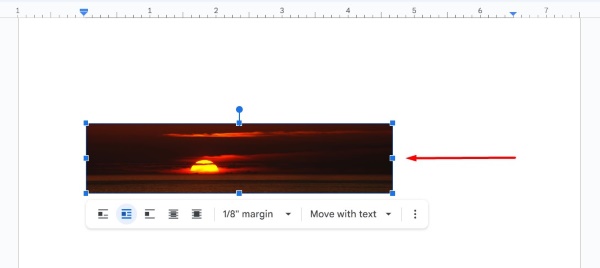
Drag the black bars on the edges of the image to adjust the crop area. Move the bars inward or outward to select the part of the image you want to keep. For example, drag the bars to focus on the sun setting over the ocean, excluding the sky above.
5. Press Enter or Click Outside to Apply the Crop
After adjusting the crop area, press the Enter key or click outside the image to apply the crop. The image will now be cropped to your selected area. For example, after pressing Enter, the sunset image will now only show the sun and the horizon, as you adjusted.
We hope you now have a better understanding of how to crop an image in Google Docs. If you enjoyed this article, you might also like our article on ways to flip an image in Google Docs or our article on how to crop an image into a circle Google Docs.


