How to Set Print Area in Google Docs (Easiest Way in 2025)
In this article, we will show you how to set the print area in Google Docs. Simply follow the steps below.
Set Print Area in Google Docs
Below, we will show you how to set the print area in Google Docs.
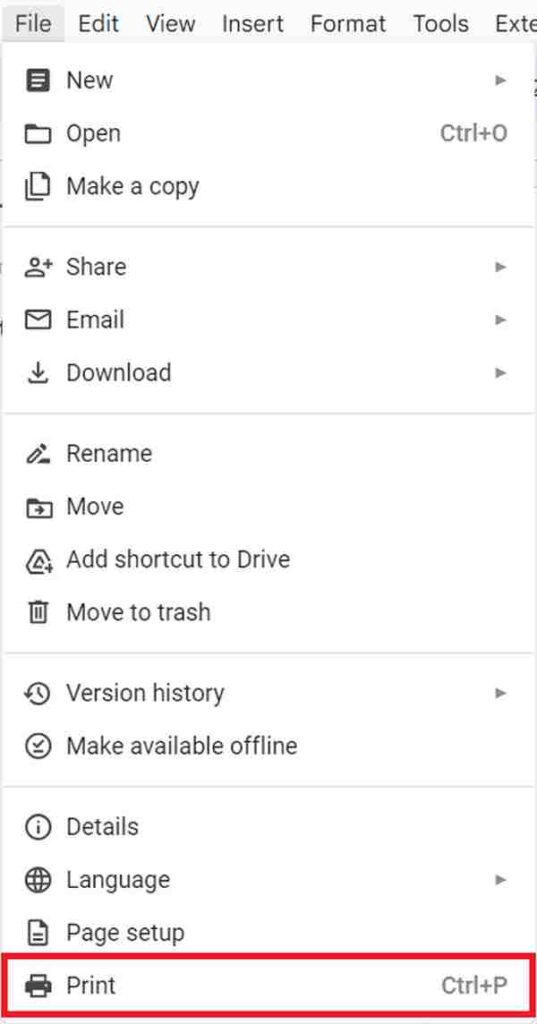
1. Access Print Settings via File Menu or Shortcut
To open the print settings, click on the File menu located in the upper-left corner of the Google Docs interface.
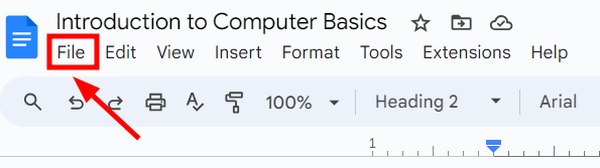
From the dropdown menu, select Print. Alternatively, you can quickly open the print settings dialog by pressing Ctrl + P on your keyboard.
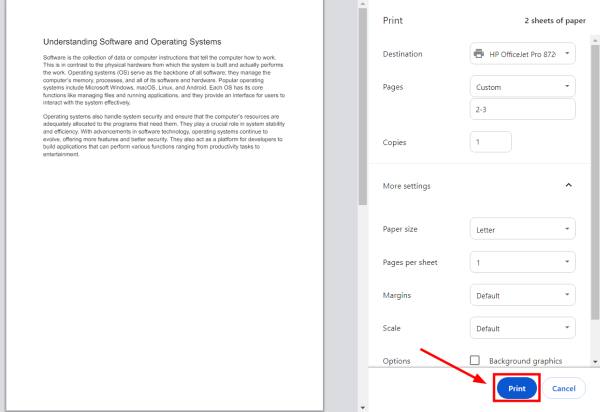
2. Select ‘Custom’ in the Pages Dropdown Menu
In the print settings dialog box, find the Pages dropdown menu, which is typically set to All by default.
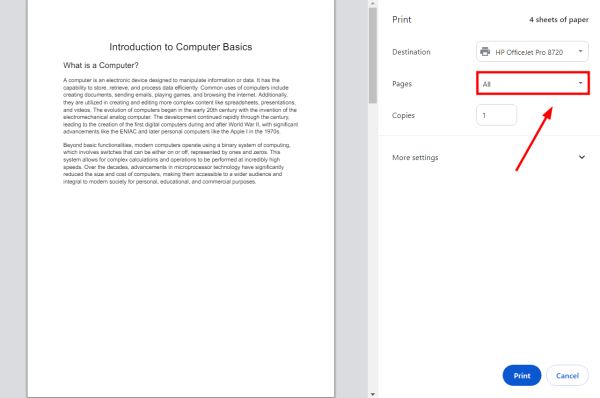
Click on this menu and select the Custom option. This allows you to specify exact page numbers and ensures that only the content you want is printed.
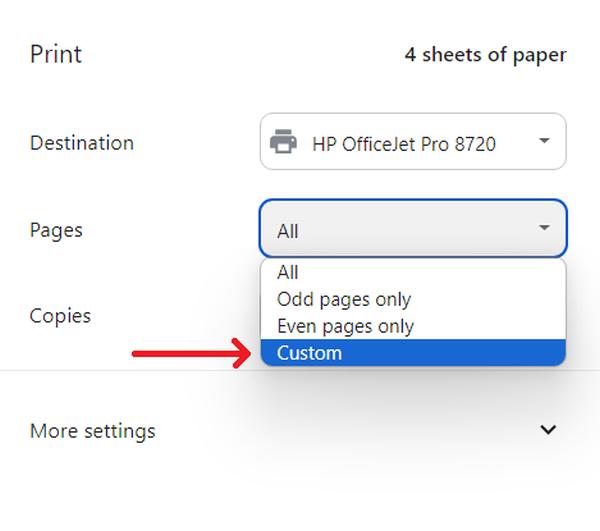
3. Enter the Page Numbers of Your Selected Text
Once Custom is selected, a text box will appear where you can enter the specific pages you wish to print.
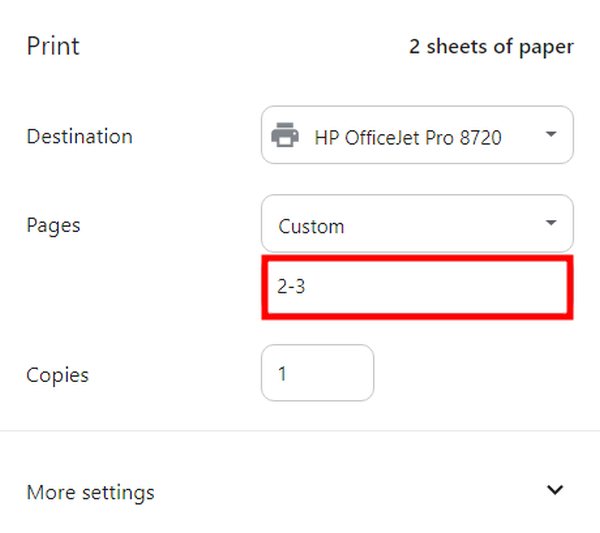
In our example, we have a document titled “Introduction to Computer Basics.” We only want to print the second and third pages. So, let’s enter 2-3 in this box.
4. Preview the Print Area and Confirm the Settings
Before finalizing the print command, take a moment to preview the document. This can be done within the print settings dialog where a preview window displays how the printed document will appear.
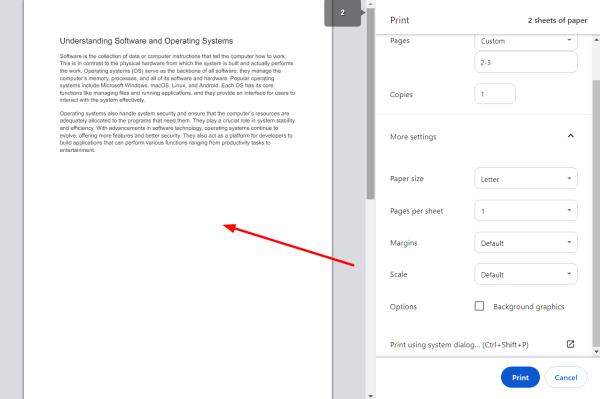
If everything looks correct, you can proceed by clicking the Print button, which will send your document to the connected printer.
We hope that you now have a better understanding of how to set print area in Google Docs. If you enjoyed this article, you might also like our article on how to access print layout in Google Docs or our article on how to print horizontally in Google Docs.