How to Crop an Image into a Circle in Google Docs (2025)
In this article, we will show you how to crop an image into a circle in Google Docs. Simply follow the steps below.
Crop Image to Circle in Google Docs
To crop an image into a circle in Google Docs, follow the process below.
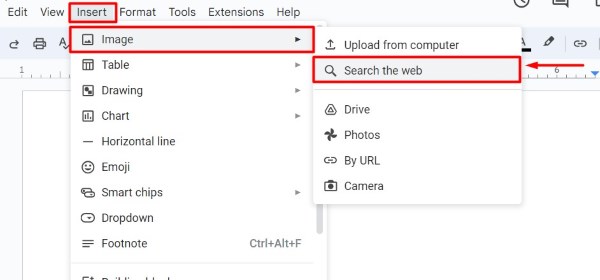
1. Insert the Image into the Document
To insert the image, click on “Insert” in the menu, then select “Image” and choose the source of your image. Choose “Search the web” to find an image online.
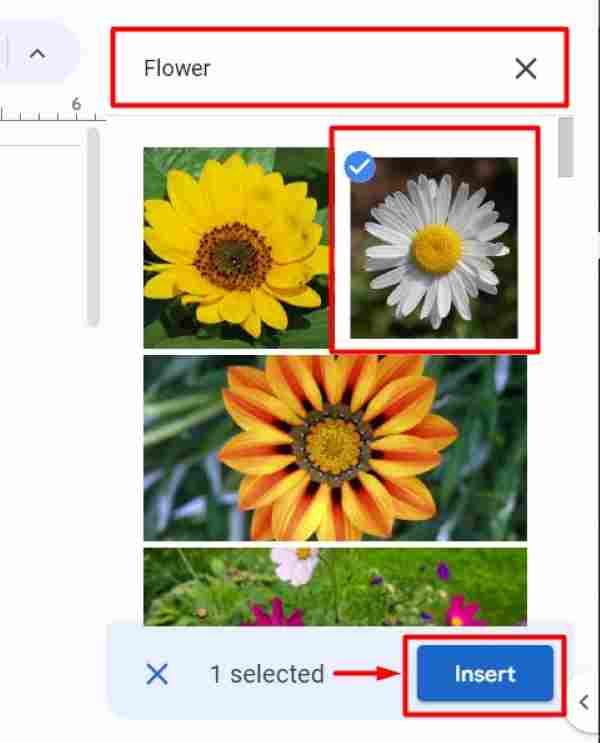
For example, you might insert a picture of a sunset, type “Flower” on the search bar. After selecting the picture, click “Insert.”
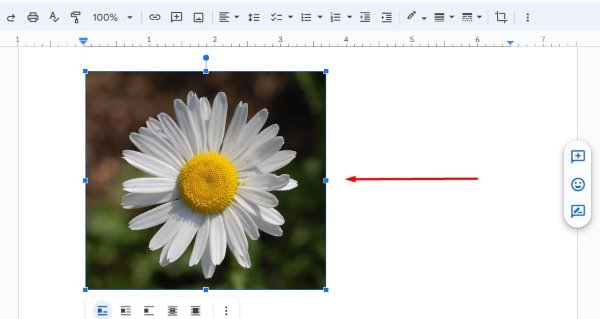
2. Select the Inserted Image
Click on the image you inserted to select it. You should see blue borders around the image. Selecting the image is necessary to access the cropping options. For example, click directly on the image of a flower you uploaded, and blue handles will appear around the edges.
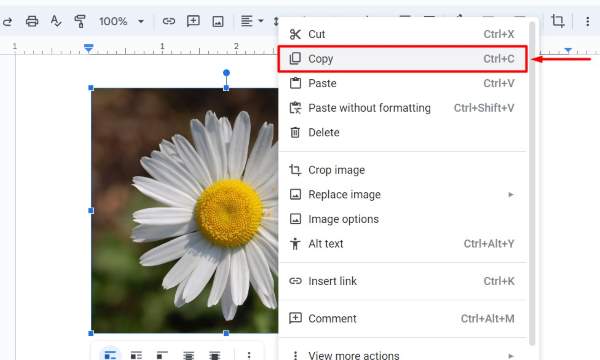
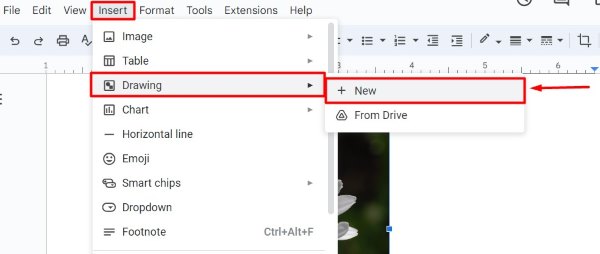
3. Copy the Image and Open Drawing Tool
Right-click on the selected image and choose “Copy.” This will copy the flower image.
Then, click on “Insert” in the menu, select “Drawing,” and click on “+ New.” This will open the Google Drawing tool where you can edit the image.
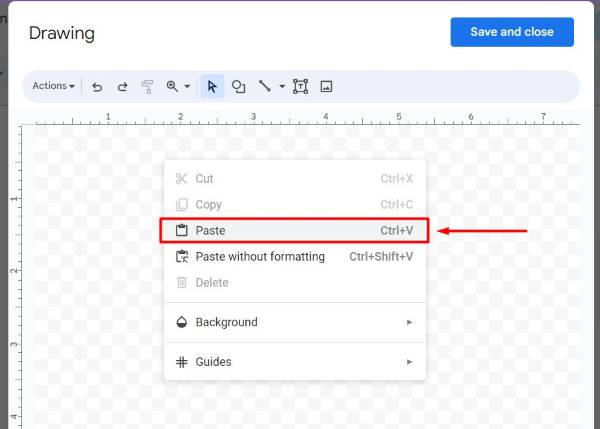
4. Paste the Image in the Drawing Tool
Right-click in the Drawing tool and select “Paste” to paste the copied image. The image will appear in the Drawing tool, ready for editing. In this example, paste the flower image you copied into the blank Drawing tool canvas.
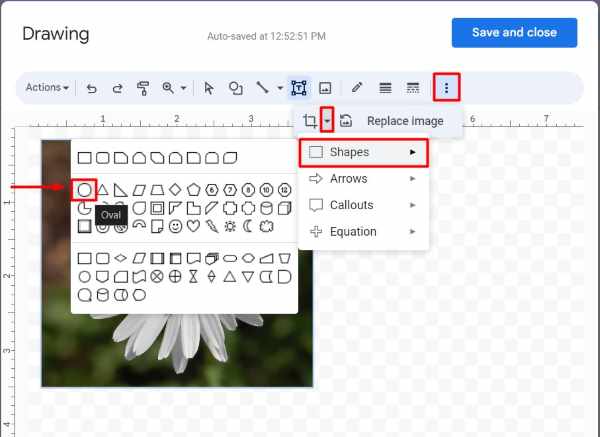
5. Use the Mask Image Tool to Create a Circle
Click on the “Crop” dropdown menu in the toolbar, then select “Shapes,” and choose the circle shape to crop your flower image into a circular shape. This will change the shape of the image to a circle.
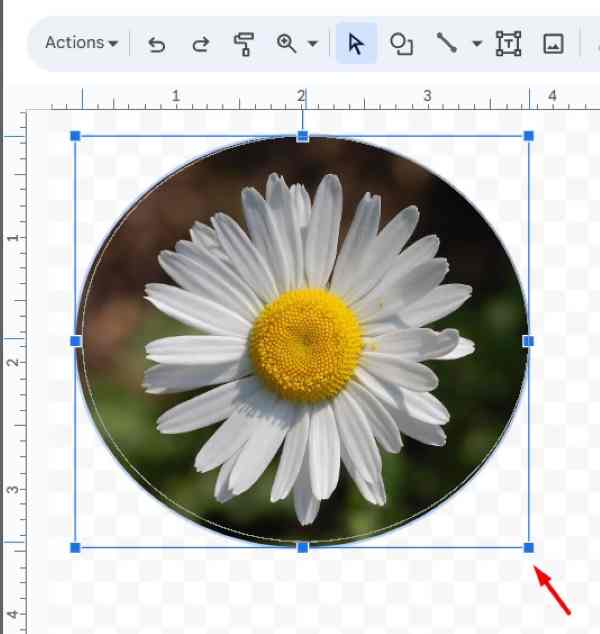
6. Adjust the Circle Crop
Drag the handles to adjust the size and position of the circular crop. Ensure the most important part of your image fits within the circle. For example, adjust the circle to make sure the flower’s center is perfectly centered within the circle shape.
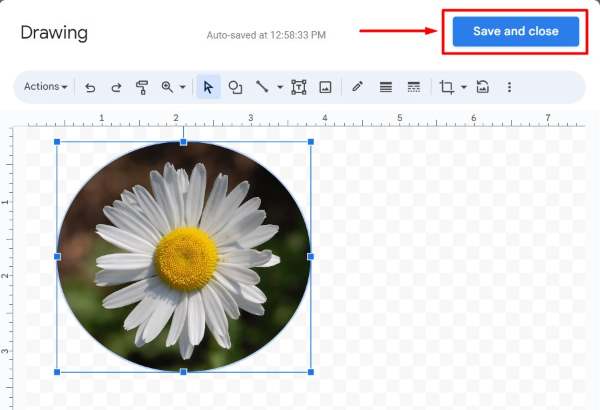
7. Save and Insert the Cropped Image
Click “Save and Close” in the Drawing tool to insert the cropped image back into your Google Docs document.
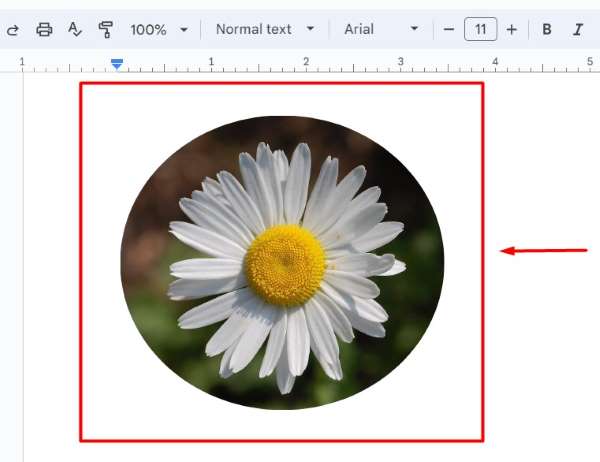
This finalizes the process and inserts the circular-cropped image into your document.
We hope you now have a better understanding of how to crop an image into a circle in Google Docs. If you enjoyed this article, you might also like our article on ways to crop an image in Google Docs or our article on how to add captions to images in Google Docs.