How to Make a Table With Different Sized Cells in Google Docs
In this tutorial, we will show you exactly how to make a table with different sized cells in Google Docs. Simply follow the steps below.

Create a Table with Different-Sized Cells in Google Docs
Follow the steps below to set a table with different cell sizes in Google Docs.
1. Access Table Properties
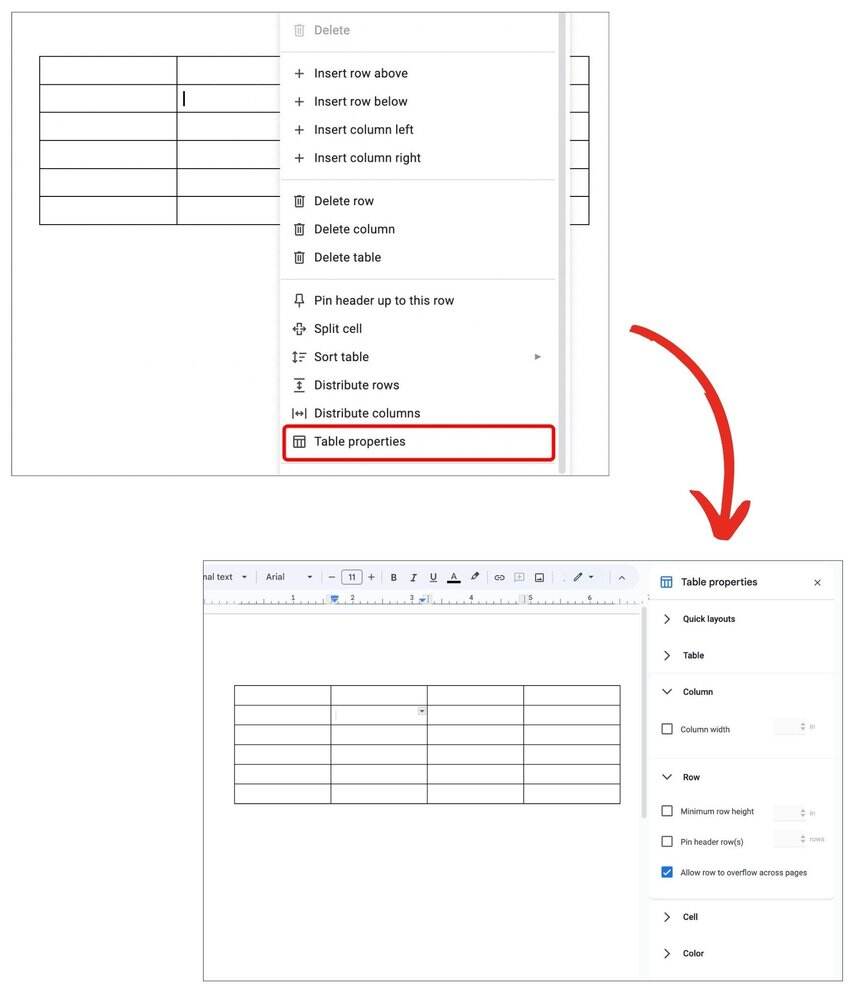
“Right-click” a cell in your table that you want to resize, then select “Table properties” from the menu. The Table Properties panel will open on the right side of the screen.
2. Adjust Row Height
Navigate to the “Row” section and “check” the box for “Minimum row height” to enable custom row height. Then, enter your desired height in inches. As you adjust the height, the row will automatically resize to match your specifications.

3. Set Column Width
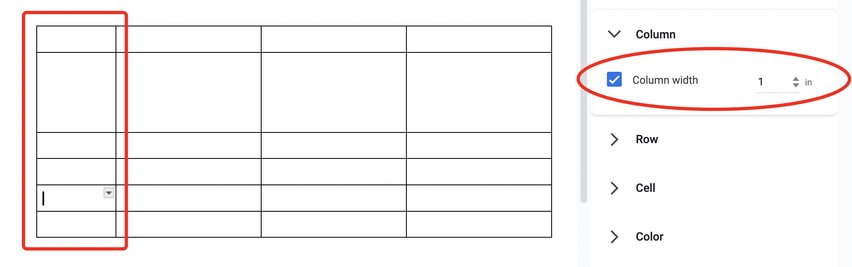
While having the table properties still open select the cell and open the Column section. Check “Column width” and enter your desired width in inches. The column will resize automatically.
We hope that you now have a better understanding of how to resize different table cells on Google Docs. If you enjoyed this article, you might also like our articles on how to center justify the words in a table in Google Docs and how to change table colors in Google Docs using Mobile Phones.