How to Move Rows in Google Docs (Easiest Way in 2025)
In this tutorial, we will show you exactly how to move rows in Google Docs. Simply follow the steps below.

How Do I Move a Row in Google Docs
Follow the steps below to move specific rows in Google Docs.
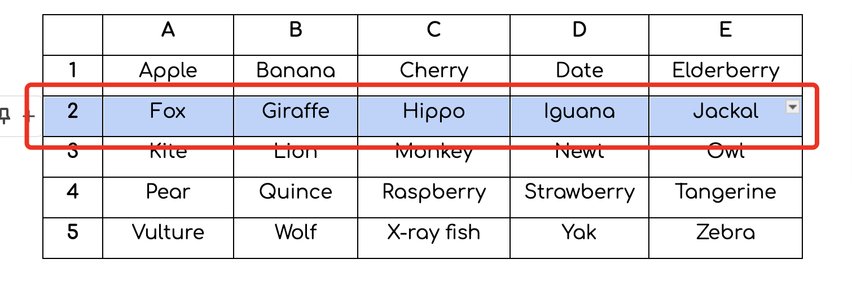
1. Select the Row You Want to Move
To begin, “highlight” the row you want to move. You can do this by “clicking” and “dragging” your cursor across the row to select the entire line of cells.
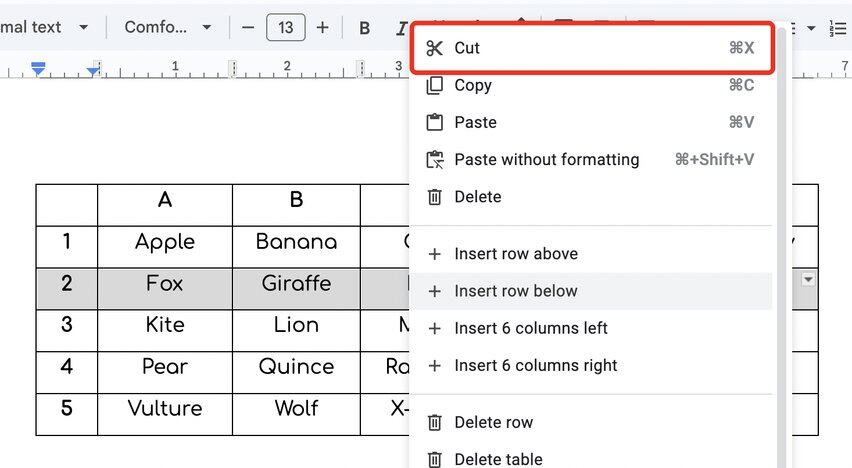
2. Cut the Selected Row
After selecting the row, “right-click” and choose the “Cut” option from the menu that appears. Alternatively, you can use the shortcut “Ctrl + X” (Windows) or “Command + X” (Mac).
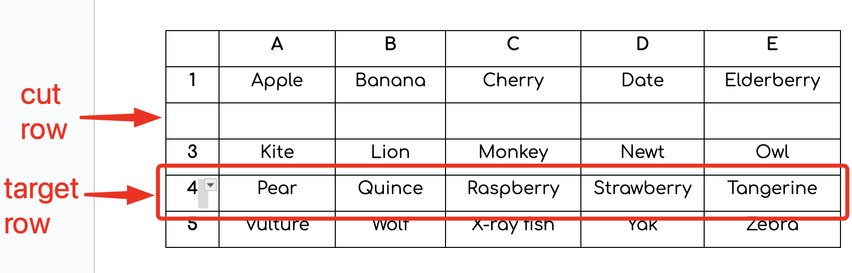
3. Place your Cursor at the Target Row
Scroll to the area where you want to move the row. Click the first cell of the target row. This will be the new position for your cut row.
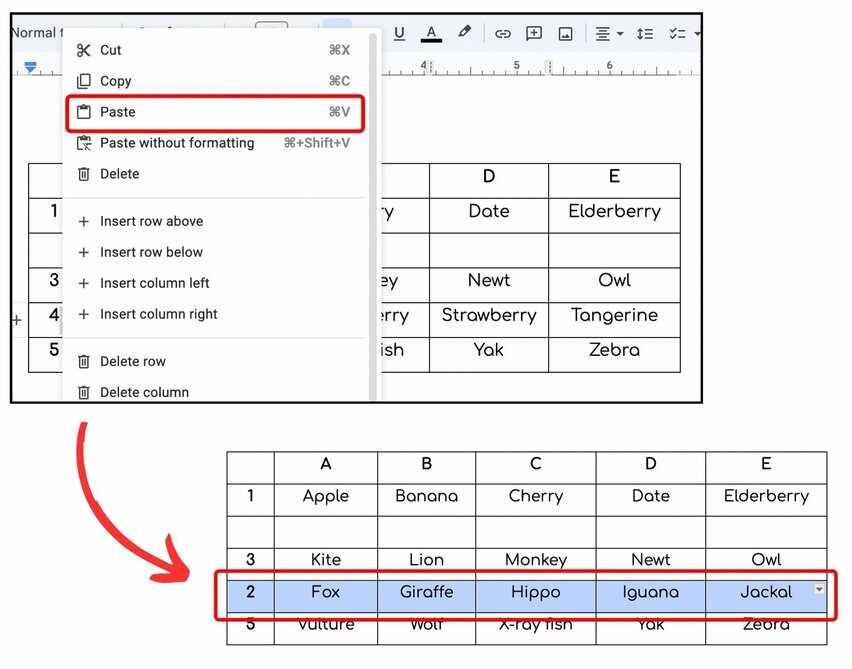
4. Paste the Row in its New Location
“Right-click” and select “Paste” from the menu. Alternatively, you can press “Ctrl + V” (Windows) or “Command + V” (Mac) to paste.
We hope that you now have a better understanding of how to move rows on Google Docs. If you enjoyed this article, you might also like our articles on how to highlight rows on Google Docs and how to make bubble letters on Google Docs.