How to Freeze a Row in a Google Docs Table (2025 Update)
In this tutorial, we will show you exactly how to freeze a row in a Google Docs table in just a few simple steps. Read on to learn more.

Freezing a Row on a Google Docs Table
Follow the steps below to pin a row on a table in Google Docs.
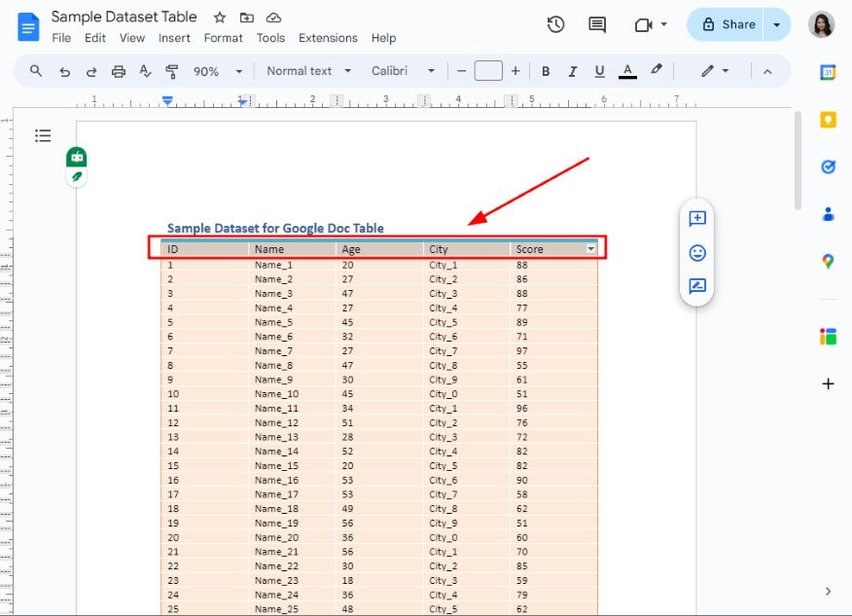
1. Select the First Row of the Table
Click and drag to highlight the entire first row of the table. This is the row that you want to pin as the header, making it stay visible for easier reference.
2. Right-Click on the Highlighted Row
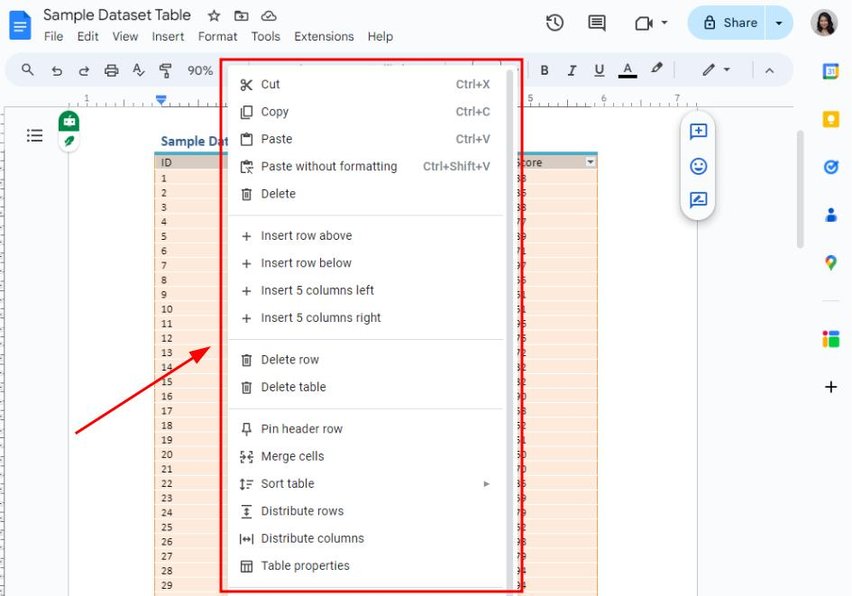
Right-click anywhere within the highlighted row to bring up the options menu. This menu allows you to make changes to the table and pin the header.
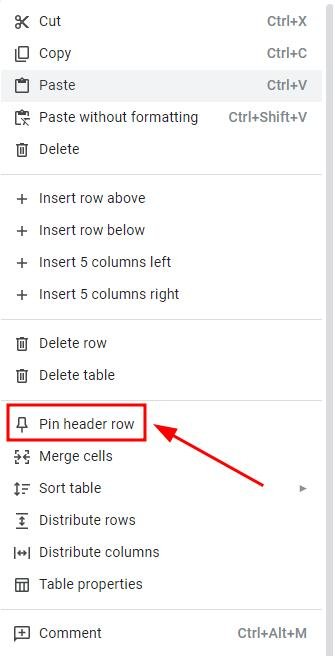
3. Click on “Pin Header Row” from the Menu
From the options that appear in the menu, click on “Pin header row.” This will fix the top row so that it remains at the top while scrolling through the rest of the pages.
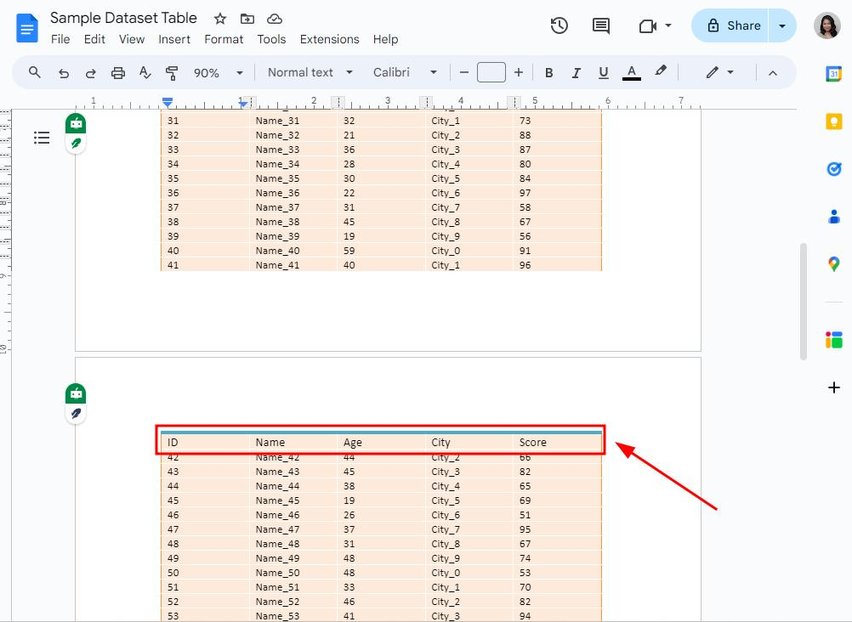
4. Confirm the Header Row is Pinned by Scrolling Down
Scroll down through your document to confirm that the header row remains visible at the top of the table. This ensures that the header is pinned properly. Here you can see that the header is applied to the second page.
5. Format the Header Row if Needed for Clarity
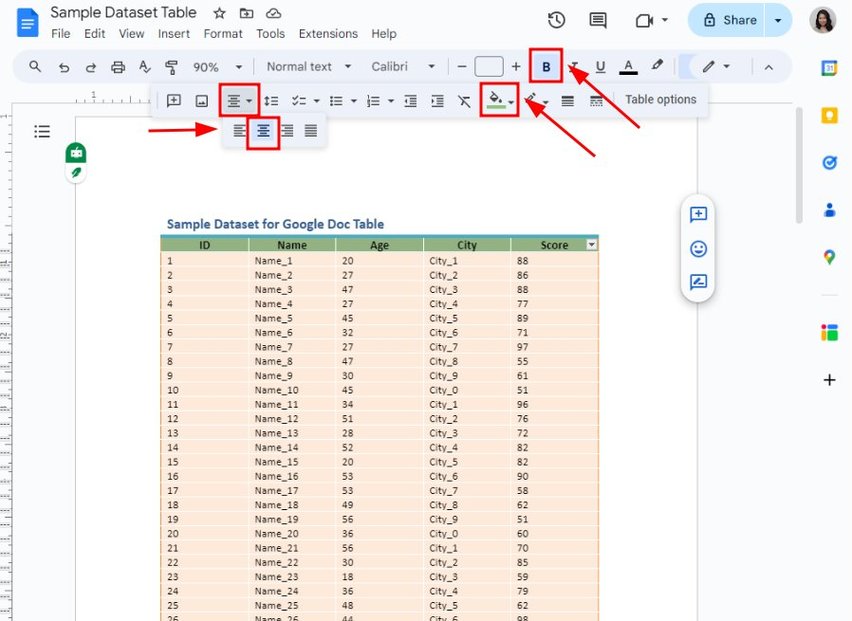
Highlight the header row and click “B” to bold the text. Tap the Paint Bucket tool to set a background color. Finally, use the Center Align option under Align & Indent to make it stand out.
6. Save and Ensure Changes are Applied
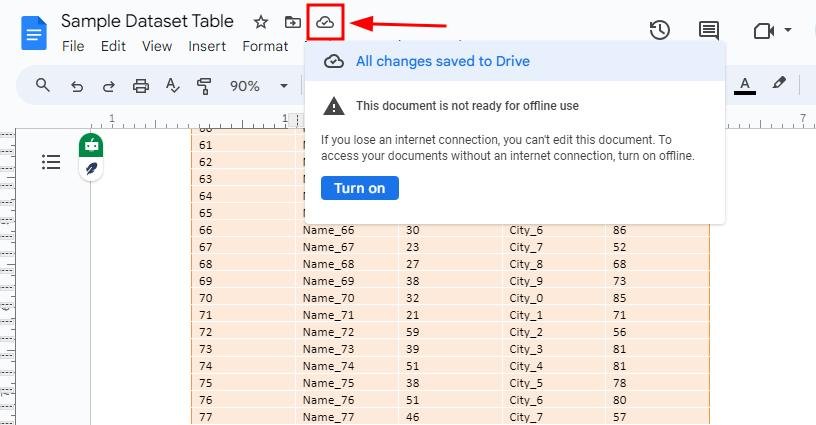
Google Docs saves automatically, but double-check to ensure all changes are retained. Click on the cloud icon to see if the changes are saved to Drive.
We hope that you now have a better understanding of how to fix a row at the top of a Google Docs table. If you enjoyed this article, you might want to check our articles on how to show only heading 1 in the table of contents in Google Docs and how to remove space before a table in Google Docs.


