How to Switch Between Columns in Google Docs (2025 Guide)
In this tutorial, we will show you exactly how to switch between columns in Google Docs in just a few simple steps. Read on to learn more.

Move Between Columns in Google Docs
Follow the steps below to move between columns on Google Docs.
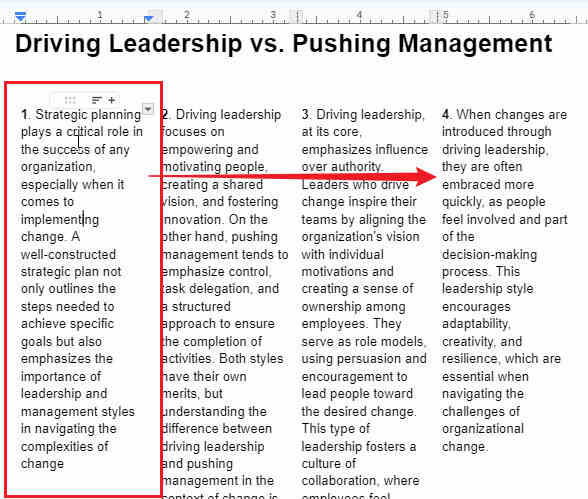
1. Click on the Column You Want to Move
In the example below, we will move the 1st column to the 4th columns’ place. To do this, click anywhere in the column you want to move; there’s no need to highlight all the text.

2. Drag the Column You Want Selected
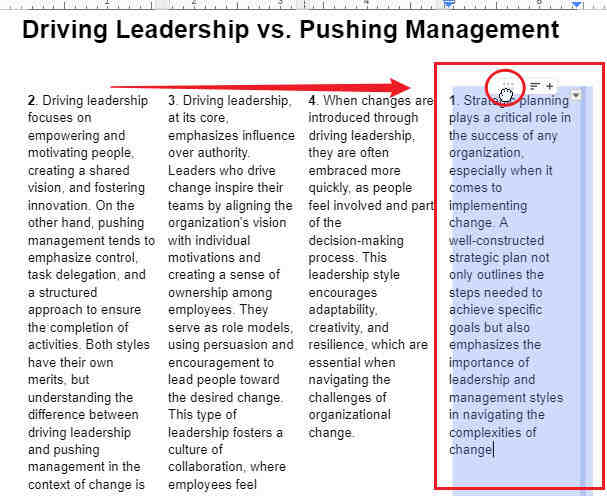
Click and hold 𝌅 the drag icon of the column while you move it to your desired designation. The icon should appear as your cursor hovers to the top portion of the table column.

Review the results and adjust accordingly. In our example’s case, column 1 should be placed after the 4th column.

We hope that you now have a better understanding of how to move between columns in your Google Docs file. If you enjoyed this article, you might also like our articles on how to add rows and columns in Google Docs and how to remove a column break in Google Docs.


