How to Wrap Images in Google Docs (Easiest Way in 2025)
In this tutorial, we will show you exactly how to wrap images in Google Docs in just a few simple steps. Read on to learn more.

Wrap an Image in Google Docs
Follow the steps below to wrap your images in Google Docs.
1. Insert the Image into Your Document
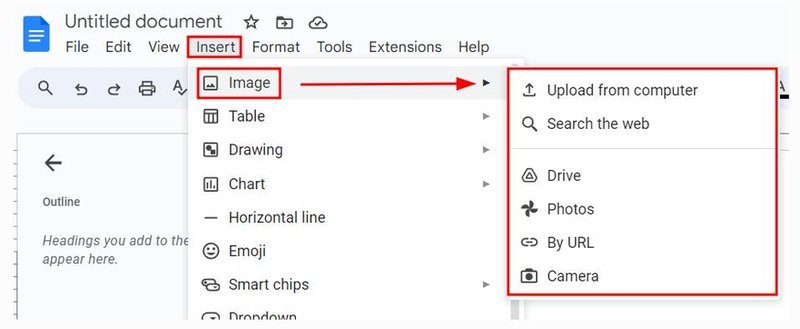
Place your cursor where you want the image. Use the “Insert” menu, select “Image,” and choose your source to add the image to your document.
2. Select the Image by Clicking on It
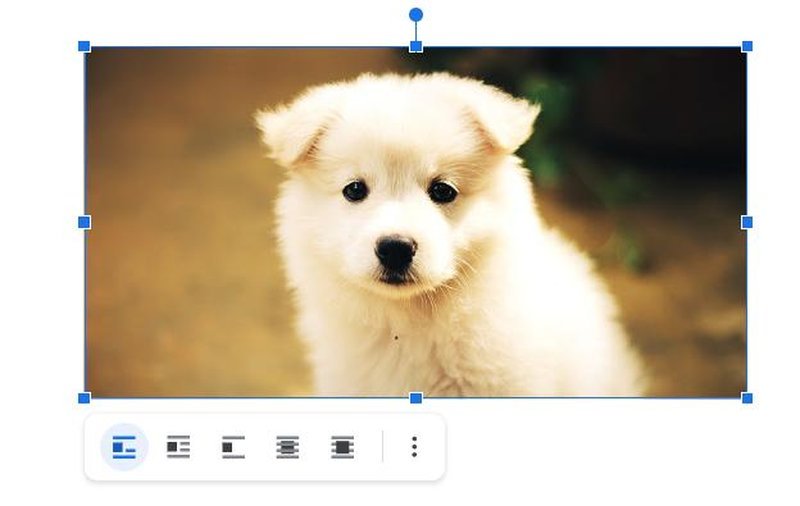
Click on the image you just inserted. This action will select the image and show blue handles around its edges.
After selecting the image, a small toolbar will appear beneath it. This toolbar contains options for formatting the image, including text wrapping.
3. Select the “Wrap Text” Option
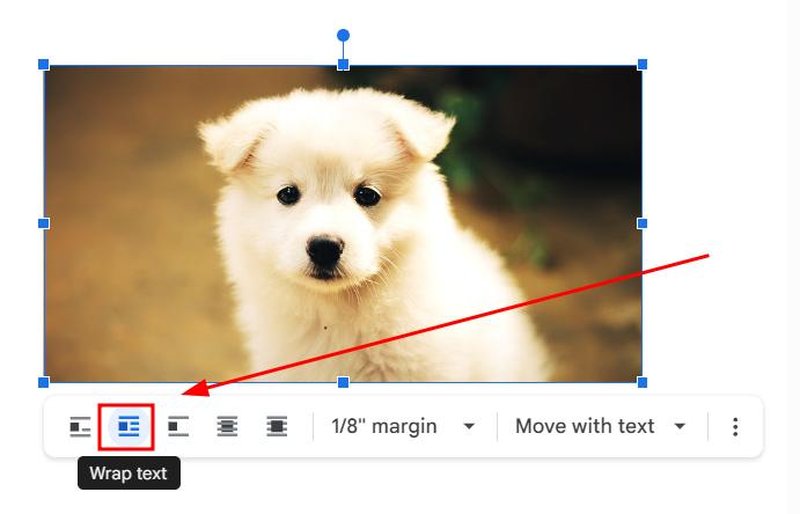
In the image toolbar, click on the “Wrap text” icon. This option allows the text to wrap around the image, giving it a more integrated look within your document.
4. Move the Image to Your Desired Location
Click and drag the image to the place where you want it within your document. The text will automatically wrap around the image as you move it.
5. Adjust the Margin Between Image and Text
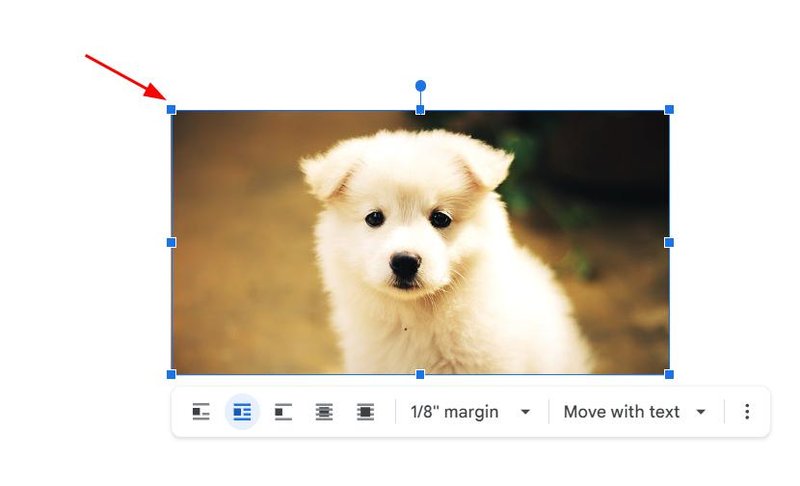
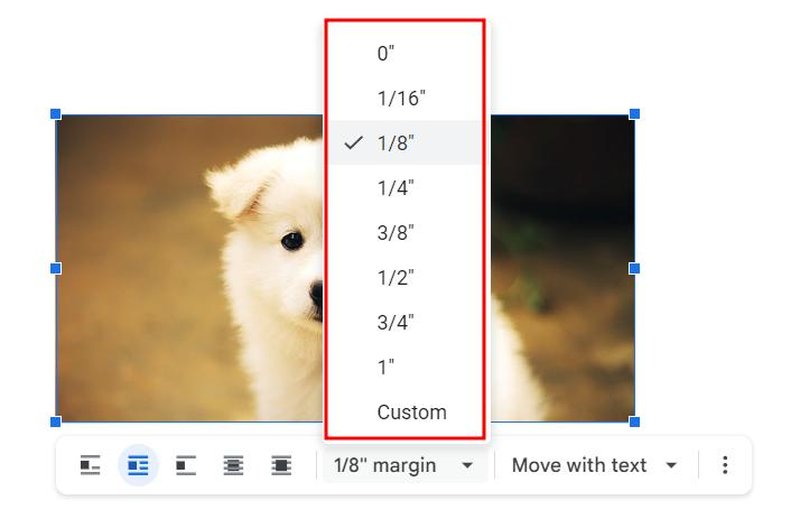
Use the margin controls under the “Wrap text” option to fine-tune the space between the image and the surrounding text.
6. Resize the Image as Needed
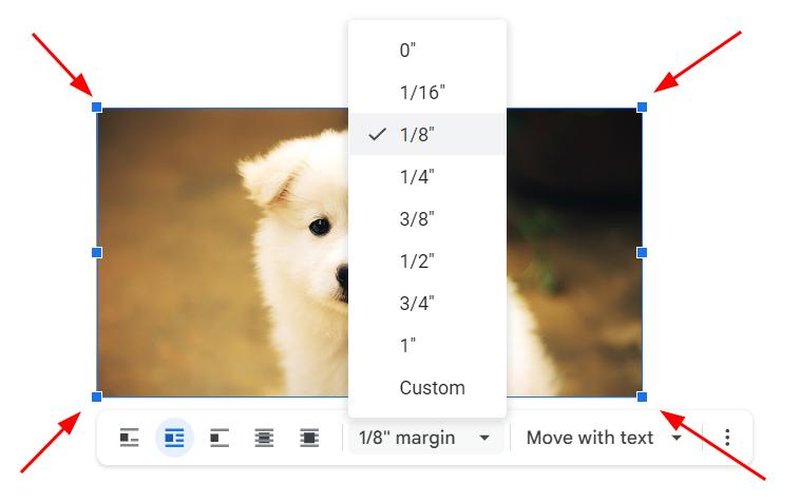
Click and drag the blue handles on the image’s corners to resize it. The text wrapping will adjust as you change the size of the image.
7. Review and Save Your Document
Check the document to ensure the image is positioned and wrapped correctly. Make any necessary adjustments, then save your document.
If needed, make any final adjustments to the image’s size, position, or text wrapping settings. Once everything looks good, your document is ready to go.
We hope that you now have a better understanding of wrapping images in Google Docs. If you enjoyed this article, you might also like our articles on how to edit images in Google Docs and how to delete images on Google Docs.


