How to Curve Words in Google Docs (Easiest Way in 2025)
In this article, we will show you how to curve words in Google Docs in just a few simple steps. Simply follow the steps below.
How to Curve Word Art in Google Docs
Here’s how to curve words on Google Docs:
1. Sign In or Create a New Account on Canva
Visit Canva to access its design tools. You can log in with your existing credentials or sign up for a new account to start creating designs.

2. Start a New Design Project in Canva
Once you have logged in, click on the ‘Create a Design’ button located in the top right corner.

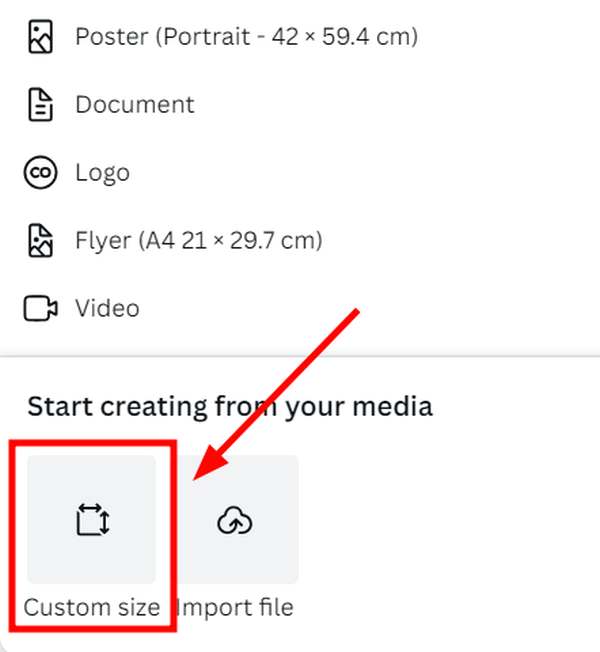
Select ‘Custom Size’ to enter your desired dimensions.
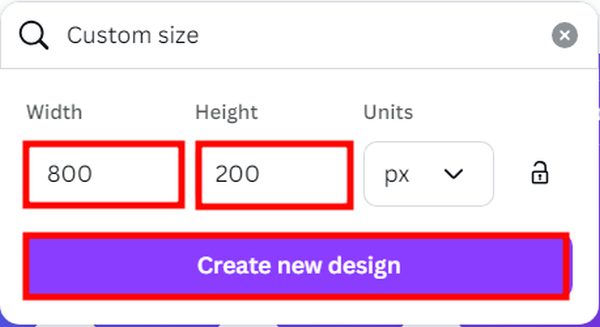
It’s important to choose dimensions that match the intended use of your design. In our example, we will input the dimensions 800 pixels for width and 200 pixels for height, which are suitable for a banner-like design where curved text can be prominently displayed.
Then, click ‘Create new design’ to create your customized blank canvas.
3. Add and Type Your Text on the Canva Canvas
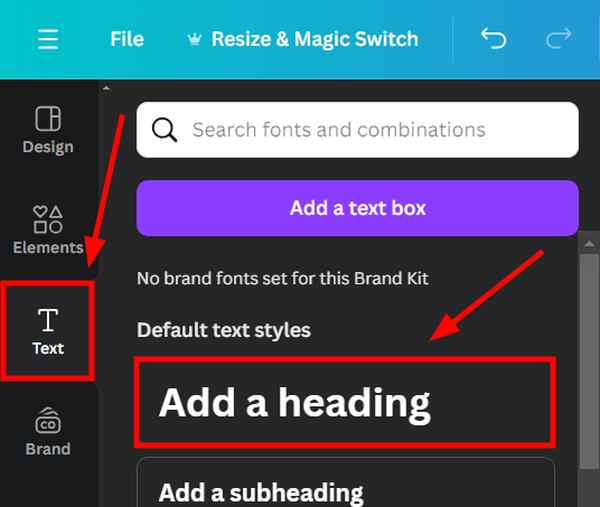
First, click on the ‘Text’ option from the left-side menu to access the text tools. Then click on ‘Add a heading’ to place a new text box on your canvas.
In our example, we will type “Discover New Horizons” in the text box.

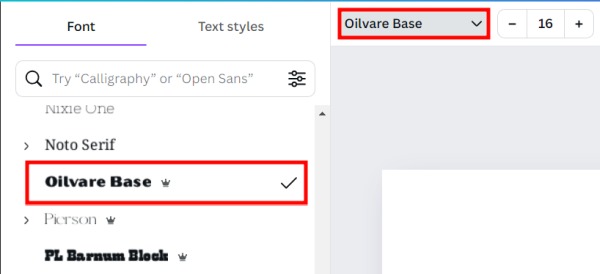
Then, choose a font that complements your design theme. To select a font, click on the font name at the top of the menu; a side menu with a list of fonts will appear. For our design, we will select the ‘Olivare Base’ font.
4. Apply the Curve Effect to Your Text in Canva
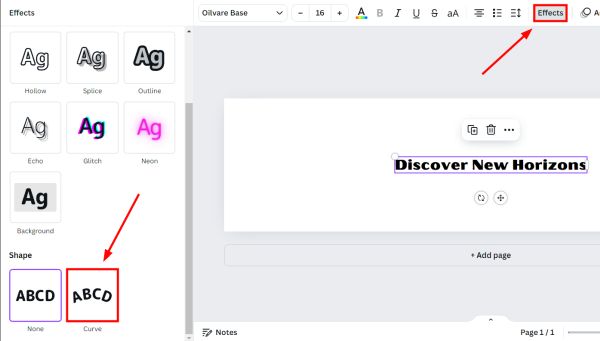
After entering your text, click on it, then navigate to ‘Effects‘ and select ‘Curve.’
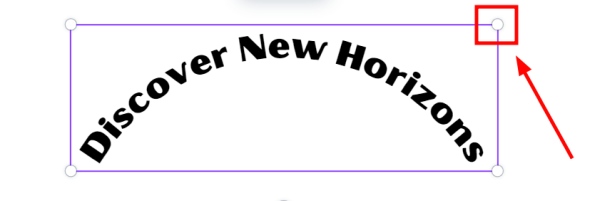
Click and drag the corner resizing handles of the text box to adjust the size of the text to fit your design better.
5. Download Your Curved Text Design from Canva
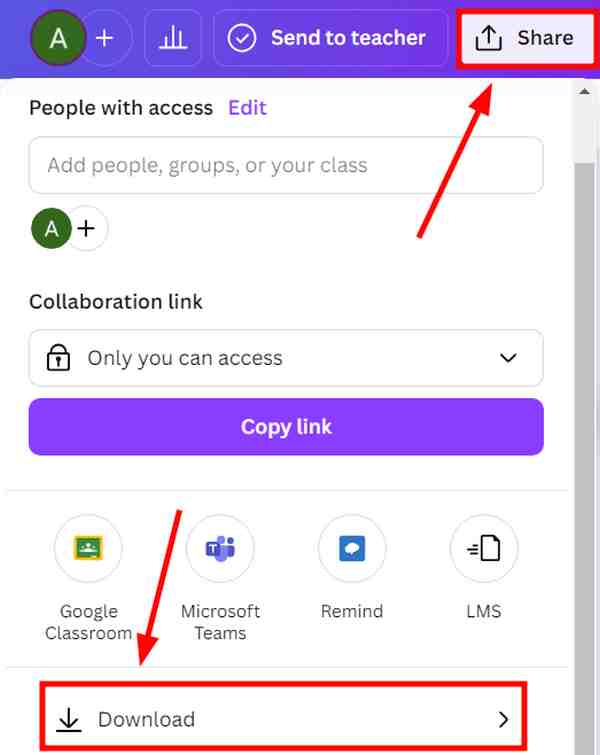
Once you are satisfied with your design, click on the ‘Share’ button located at the top right corner of the screen, and then select ‘Download’ from the dropdown menu.
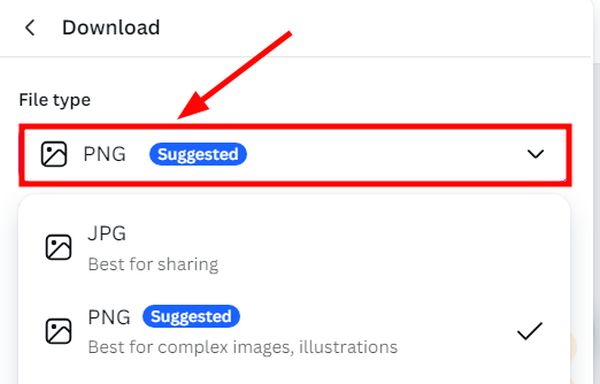
In the download settings, choose the file type by clicking on ‘File type’ and selecting either PNG or JPG for a high-quality image of your curved text.
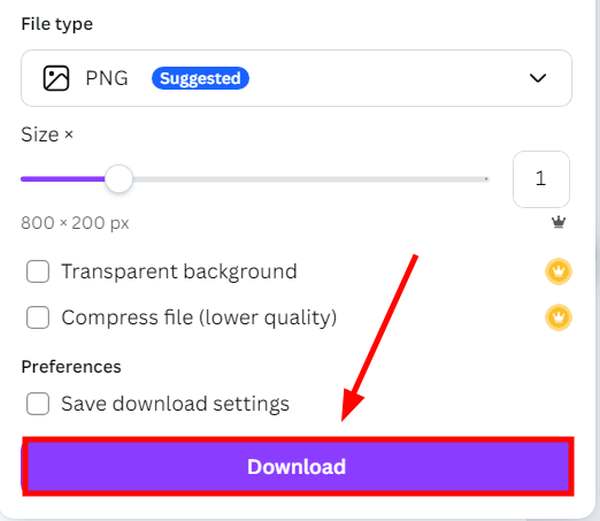
Then click the ‘Download’ button to save the image to your computer.
6. Upload and Insert Your Curved Text Image to Google Docs
In your Google Docs, go to ‘Insert‘ at the top menu, select ‘Image,’ then ‘Upload from computer.’

Find and select the curved text image we created in Canva and upload it to your document.

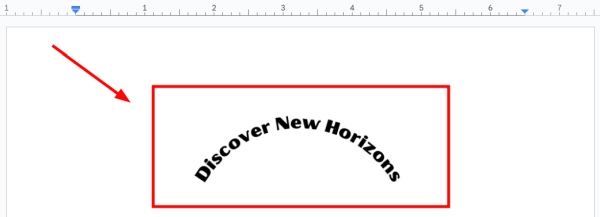
We will now see “Discover New Horizons” as a curved text image within our Google Docs document.
We hope that you now have a better understanding of how you can curve words on Google Docs. If you enjoyed this article, you might also like our article on how to highlight all words in Google Docs or our article on how to create a crossword puzzle in Google Docs.


