How to Add Captions to Images in Google Docs (2025 Guide)
In this article, we will show you how to add image captions in Google Docs. Simply follow the steps below.
Adding Captions to Images in Google Docs
To add captions to images in Google Docs, follow the steps below.
1. Click on the Image to Select It
Click on the image you want to caption. Blue squares will appear around the image, indicating it is selected. For example, if you have a photo of a sunset, click on it until you see the blue squares.
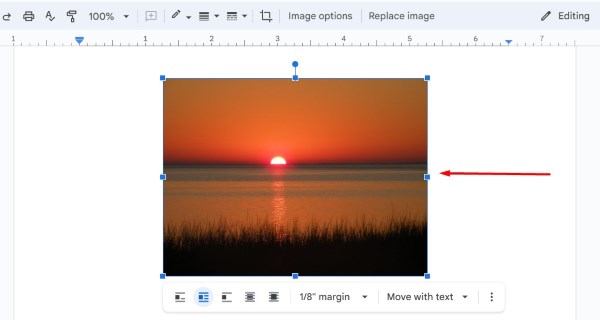
After that, right-click on the selected image and choose “Copy.”

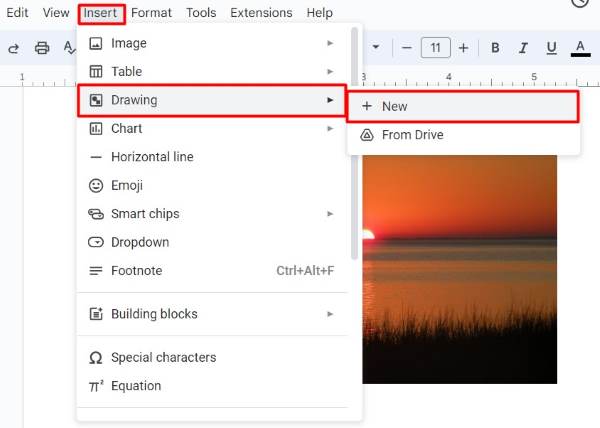
2. Go to the Insert Menu and Open the Drawing Tool
Go to the “Insert” menu at the top of the screen. This is located in the main toolbar. Select “Drawing” from the Insert menu, then click “New” to open the Drawing tool. This will open a new window.
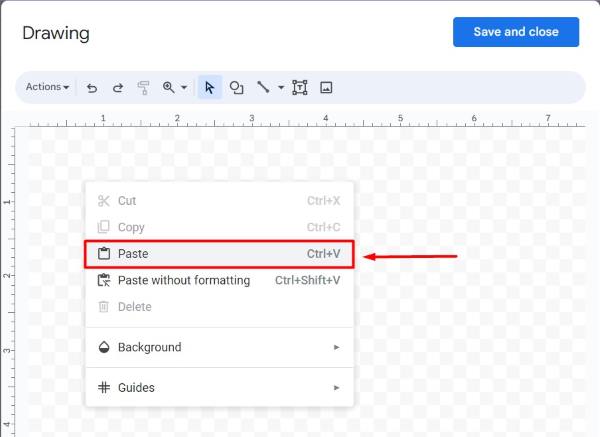
Right-click in the Drawing tool and select “Paste” to paste the copied image.
3. Create a Text Box for the Caption
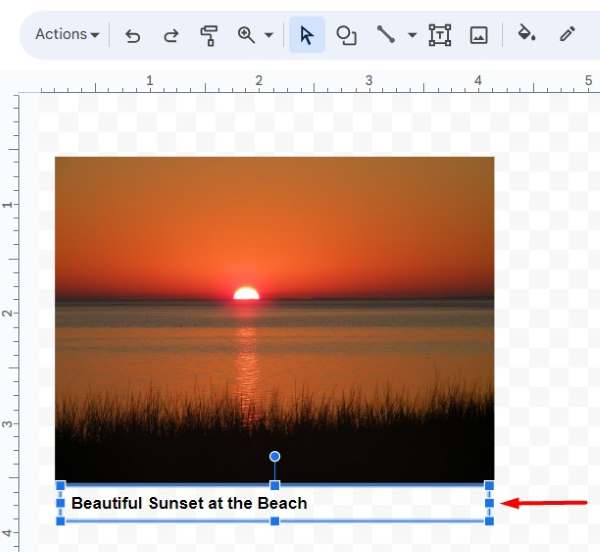
In the Drawing window, click the “Text Box” icon, which looks like a small square with a “T” in it. Draw a text box below the image by clicking and dragging your mouse.

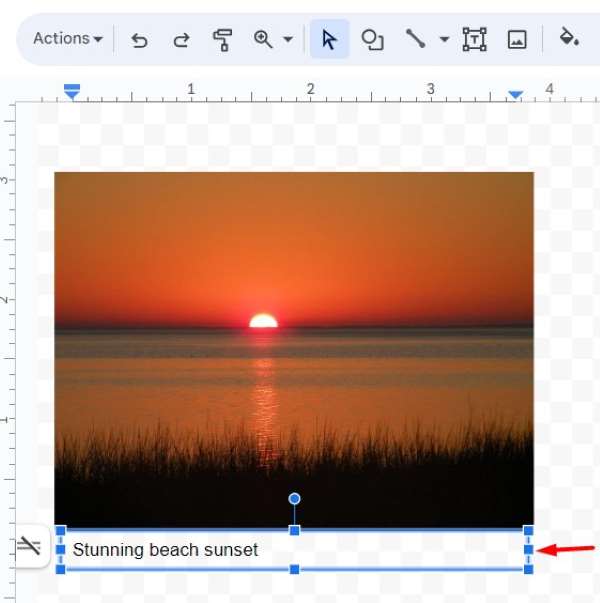
4. Type Your Caption in the Text Box
Draw the text box below the image in the Drawing window. Type your caption inside the text box, such as “Beautiful sunset at the beach.” Adjust the size of the text box as needed by clicking and dragging the corners.
5. Save and Insert the Captioned Image
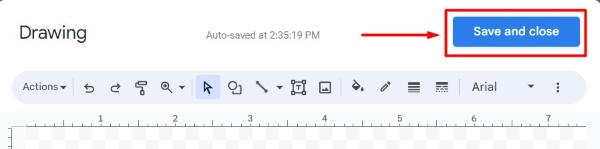
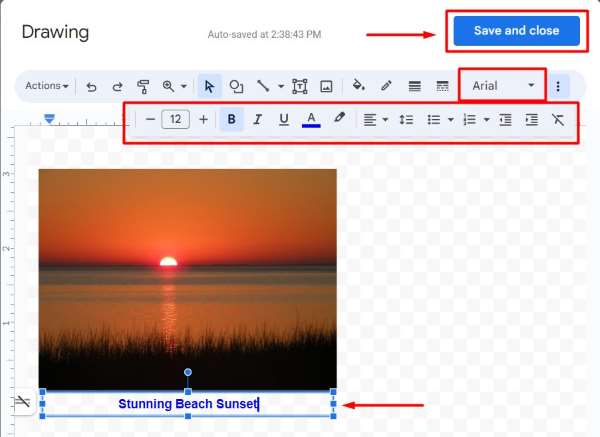
Click “Save and Close” to insert the drawing with the caption back into your document. The image and caption will appear together in your document. For example, after typing “Beautiful sunset at the beach,” click “Save and Close” to see it appear below the image.
6. Position the Captioned Image
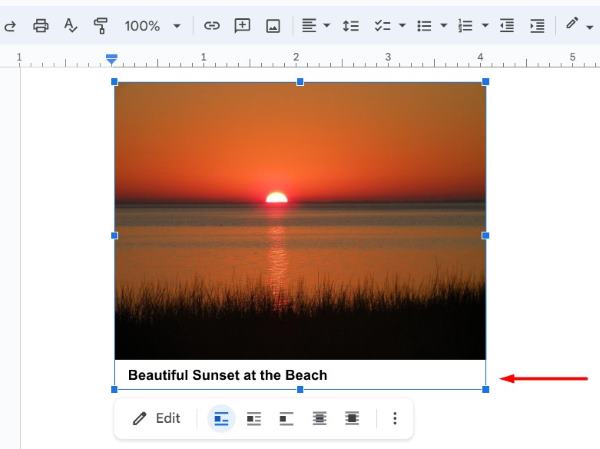
Click and drag the drawing to position it as desired in your document. You can move it above, below, or beside the original image. For example, drag the captioned image to the bottom of the original photo to make it look neat.
7. Edit the Caption if Necessary
To edit the caption, double-click on the drawing to reopen the Drawing window. Make your changes, such as correcting a typo or changing the text, and click “Save and Close” again. For example, if you need to change “Beautiful sunset at the beach” to “Stunning beach sunset,” double-click to edit.
8. Format the Caption Text Box
Double-click on the drawing, then adjust the font, size, and color of the text in the Drawing window to match your document’s style. For example, change the font to Arial, the size to 12, and the color to blue to match the rest of your document.
We hope you now have a better understanding of how to add captions to an image in Google Docs. If you enjoyed this article, you might also like our article on ways to crop an image into a circle Google Docs or our article on how to make images transparent in Google Docs.