Show Formatting Marks in Google Docs (The Right Way in 2025)
In this article, we will learn how to show formatting marks in Google Docs from the View tab or by using a hotkey. Simply follow the steps below.
How to Show Formatting Marks in Google Docs
Follow the steps below to show formatting marks in Google Docs from the View tab or by using a keyboard shortcut.
1. Select Your Text
Open the document in which you want to display the formatting marks.
2. Show Non-Printing Characters
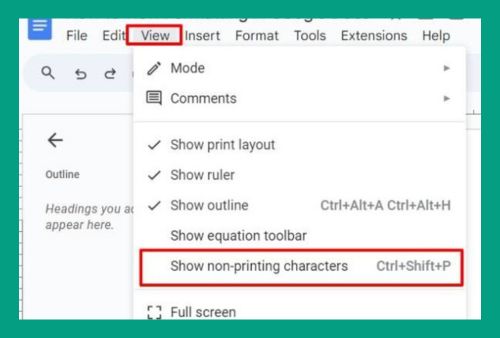
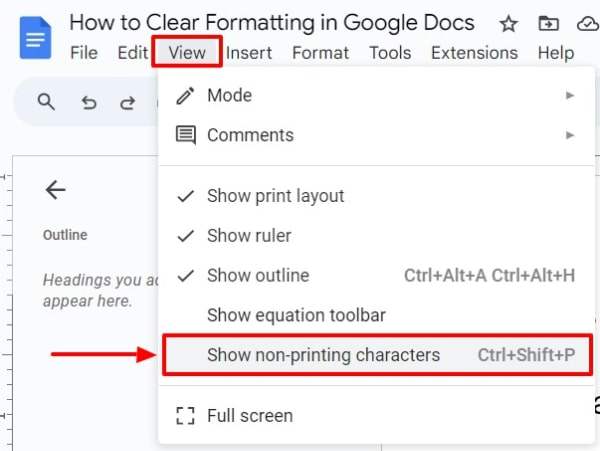
At the top of the Google Docs interface, click on the View menu and select the option that says Show non-printing characters. You can also press Ctrl+Shift+P on your keyboard. A checkmark will appear next to this option when it is active to indicate that non-printing characters are now visible in your document.
3. Verify the Formatting Marks
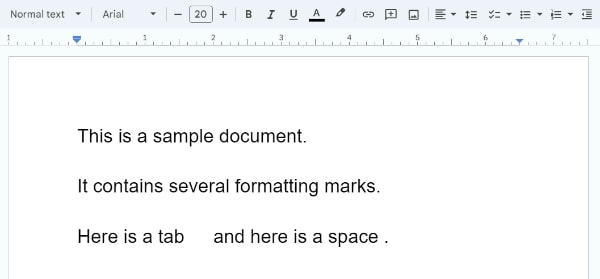
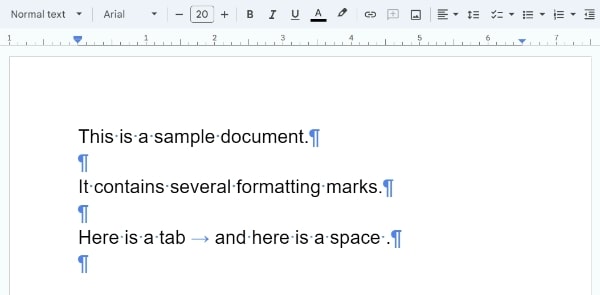
After selecting the option, you should see symbols representing spaces, paragraph breaks, and tabs in your document. These symbols help identify different types of formatting:
- A dot (·) for each space.
- A pilcrow (¶) at the end of paragraphs.
- An arrow for tab stops.
If you want to hide these characters again, simply go back to the View menu and click on Show non-printing over characters again to remove the checkmark.
We hope that you now have a better understanding of how to show formatting marks in Google Docs. If you enjoyed this article, you might also like our article on how you can format margins in Google Docs and how to format columns in Google Docs.