How to Put a Border Around Text in Google Docs (2025 Update)
In this article, we will show you how to put a border around text in Google Docs. Simply follow the steps below.
Method 1: Use the Drawing Tool to Create a Border Around Text in Google Docs
To create a border around text in Google Docs using the drawing tool, follow the process below.
1. Select and Cut the Text You Plan to Border
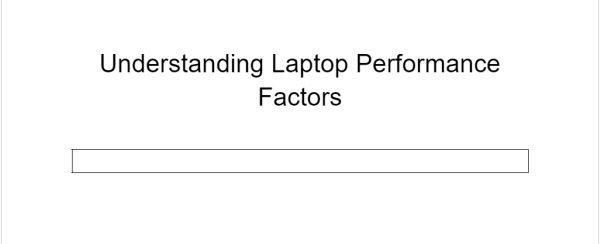
In our example, we have a document titled “Understanding Laptop Performance Factors.” We want to encase our paragraph with borders to enhance the readability of the document.

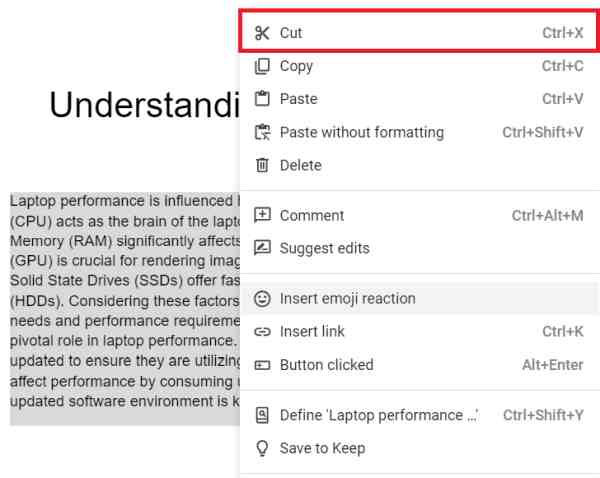
Highlight the paragraph that you want to have a border. Then, right-click and select Cut to remove the text temporarily from your document. This step prepares the text for placement in a customized text box within the drawing tool.
2. Open the Drawing Tool
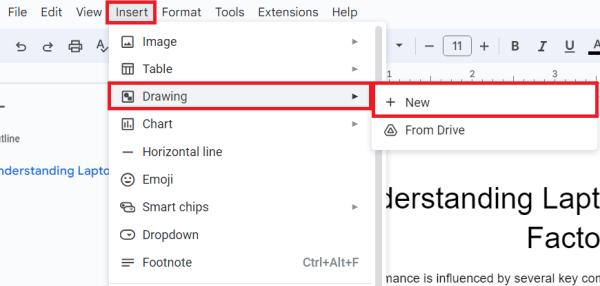
Select Insert from the top menu, then choose Drawing and click on New. This action opens the drawing editor.
3. Add a Text Box in the Drawing Editor
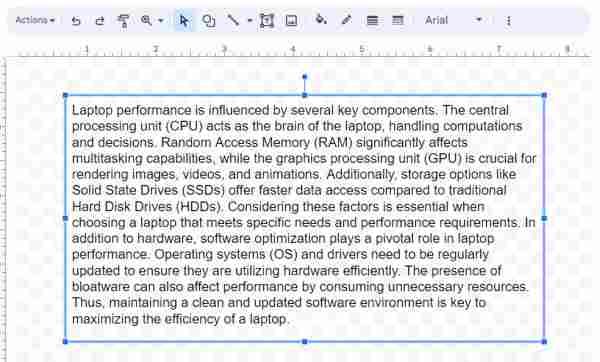
Click the text box icon (T) in the drawing editor and draw a text box in the provided space.

In this text box, paste the text you previously cut.
4. Customize the Text Box Border
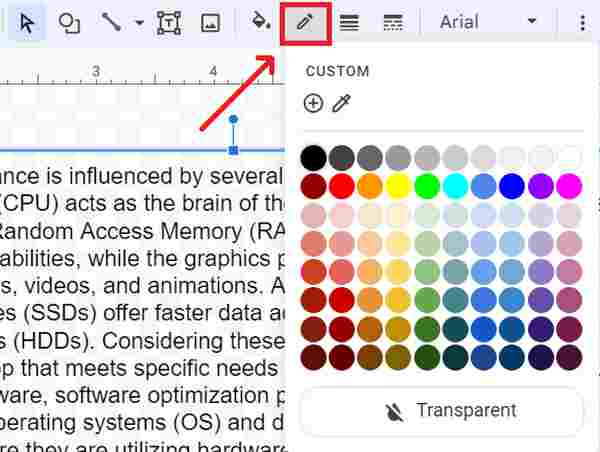
Select your text box and locate the border color icon in the toolbar. Click on this icon to open the color selection menu, then choose a color that contrasts with the background of your document to make the text box visually striking. For example, let’s select a classic black to provide a striking and professional appearance.
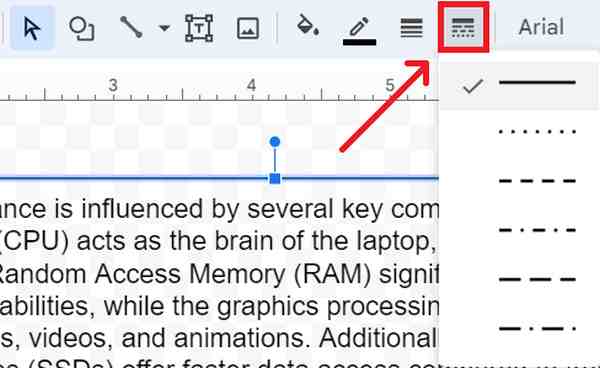
Next, adjust the border style by clicking on the border style icon, which may appear as a dashed line or feature a pen tip symbol. This allows you to select from various line styles, such as solid, dashed, or dotted, depending on the emphasis you wish to give to the text box.
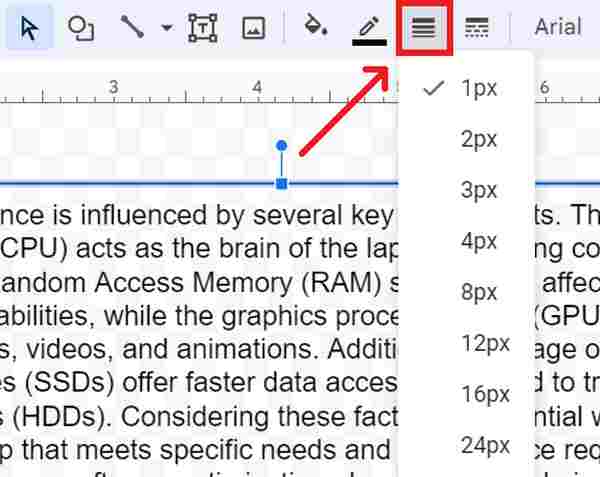
Finally, modify the border thickness by finding and clicking on the icon that resembles lines of increasing thickness. Select a suitable thickness that enhances the visibility of the text box.
5. Save and Insert the Drawing
After finalizing your text box, click Save and Close to add the drawing to your document.
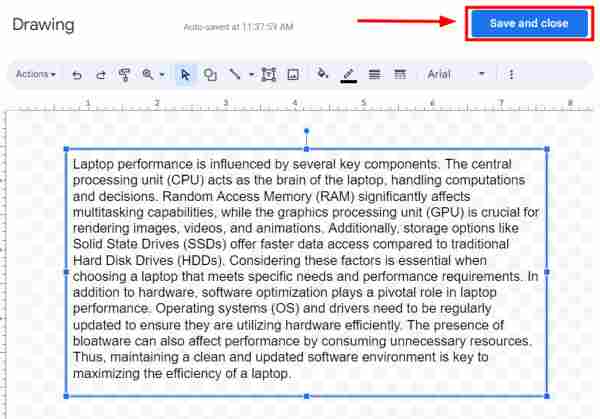
Now, you will see a well-defined border surrounding your text, effectively highlighting it within the document.

You can resize it by dragging the corners to ensure it fits well within the layout while maintaining the readability of the text.

Method 2: Using a Table to Make a Border Around Text in Google Docs
To add borders around text in Google Docs using a table, we will use the same document titled “Understanding Laptop Performance Factors.” Follow the steps below:
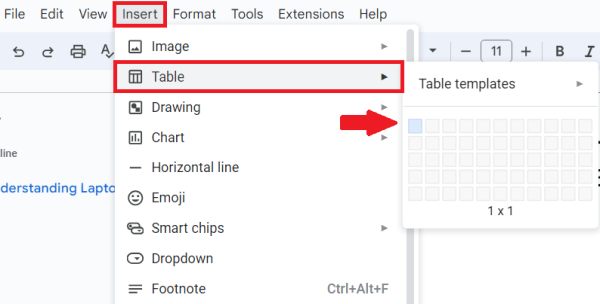
1. Insert a 1×1 Table
From the top menu, select Insert, choose Table, and add a 1×1 table.
This method uses a table to create a border around your text.
2. Enter Text into the Table Cell
Type or paste your text into the table cell.

Center the text within the cell for better visual alignment. Use the toolbar to adjust the font and size to match the rest of your document. This integration helps maintain a professional and coherent appearance.

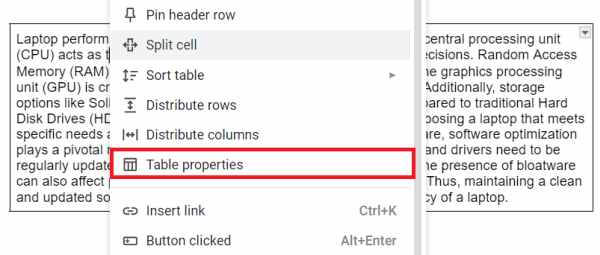
3. Customize the Table Border
Right-click on the table and choose Table properties.
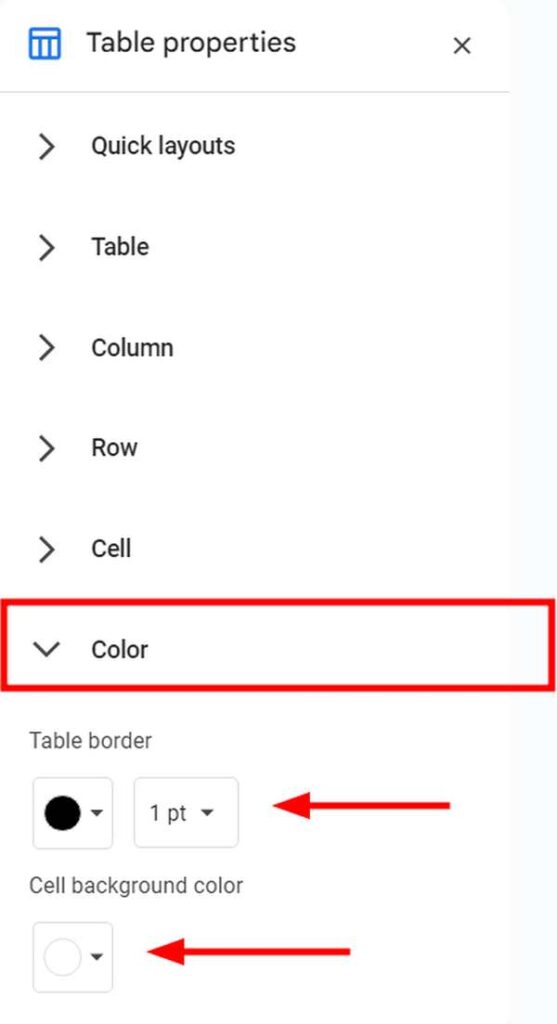
From the sidebar menu that appears, navigate to the Color section. Here, you can adjust the border color and width to align with your document’s design preferences.
Method 3: Using Paragraph Styles to Create a Border Around Text in Google Docs
Below, we will show you how to put a border around text in Google Docs using paragraph styles.
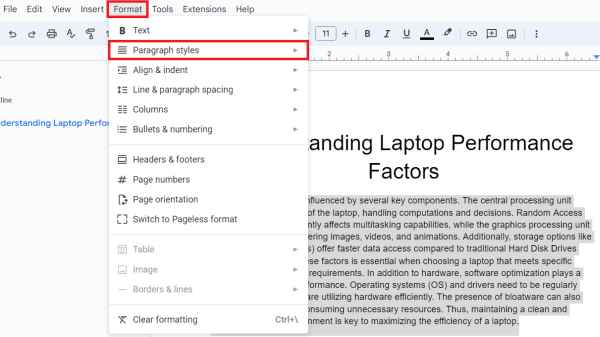
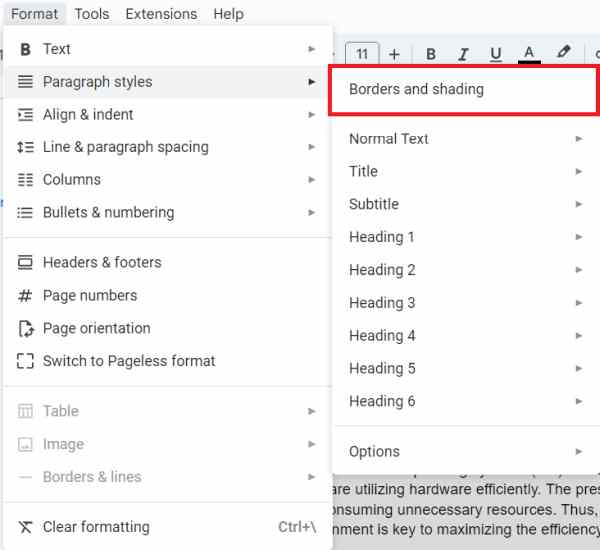
1. Select a Paragraph Style for the Text
Highlight the text you want to format, then navigate to the Format option on the top menu. From there, a submenu will appear; proceed by selecting Paragraph Styles.
2. Add a Border to the Selected Paragraph
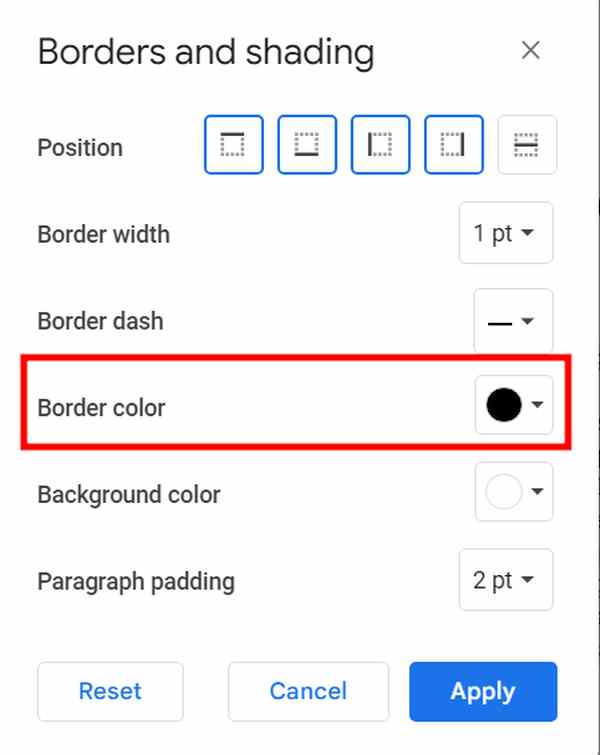
Select Borders and shadin” to add a border around the text. Experiment with different border styles and colors to find one that best highlights the section.
For example, under the Position options, we will select the icon that surrounds all sides of the text box. This choice sets the border to appear uniformly around the text, enhancing its distinctiveness within the document.
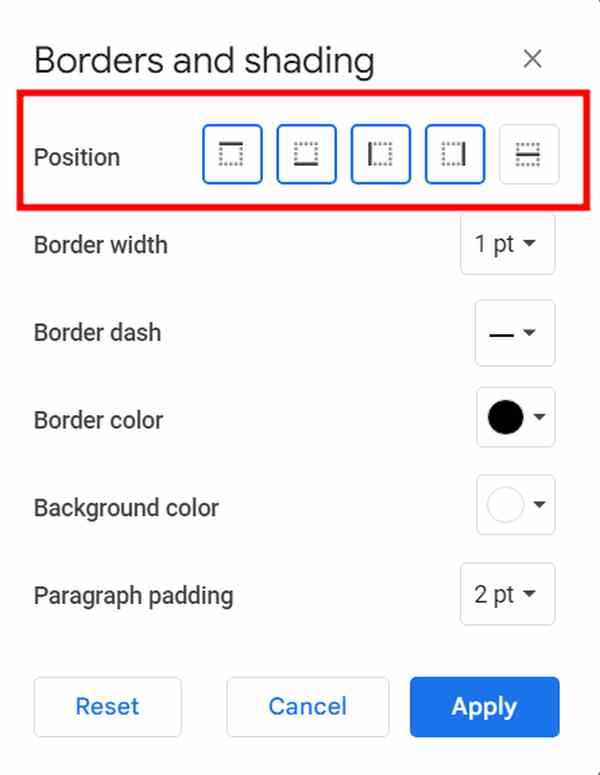
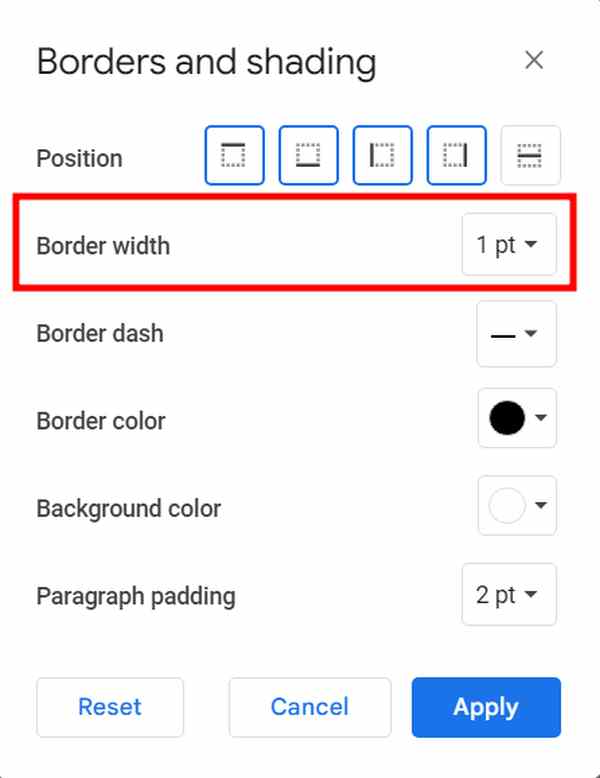
Next, we will adjust the Border width to 1 point for a subtle yet clear definition.
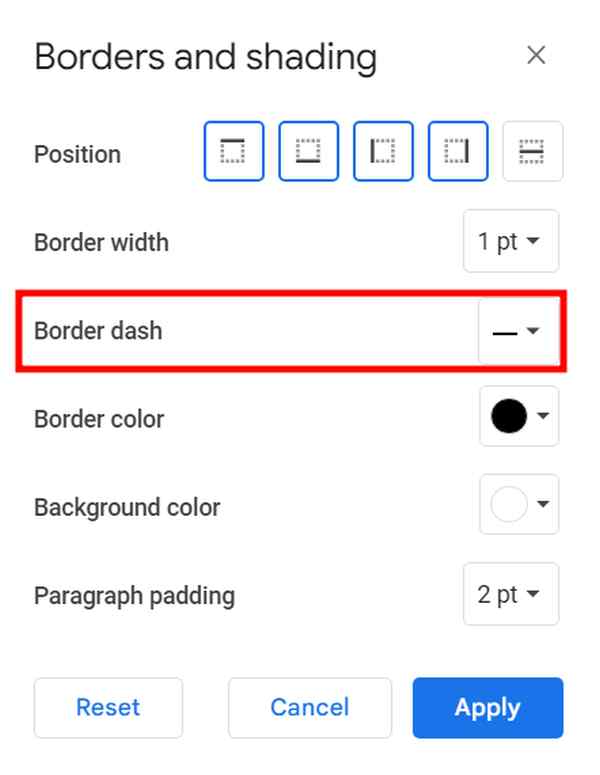
For the Border dash, we will select a solid line to maintain a clean and professional look.
Then, we will choose black for the Border color, as it offers a stark contrast and adds a strong visual statement to the document.
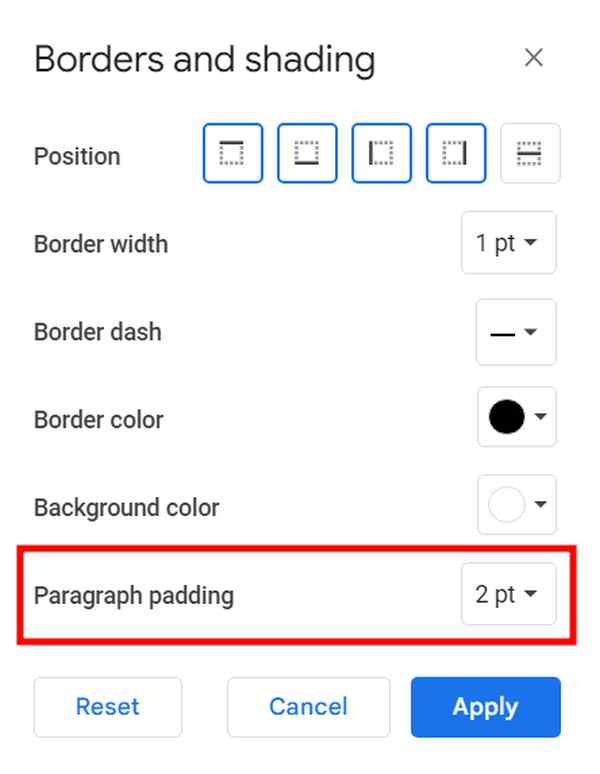
Finally, we will set the Paragraph padding to 2 points to give the text some breathing room within the bordered area, making it easier to read and visually appealing. It’s important to note that increasing the padding value further would create even more space around the text.
To finalize the changes, click Apply.
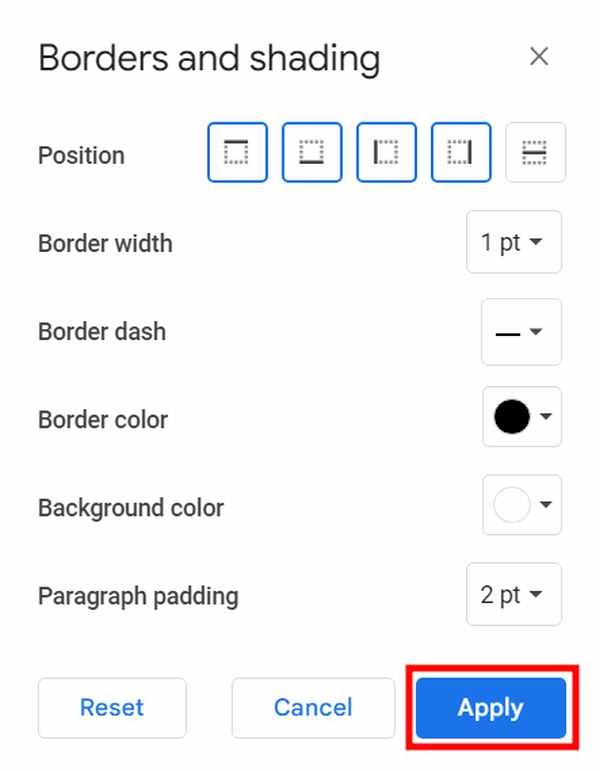
Now, we will see our text neatly enclosed within a well-defined border.

We hope that you now have a better understanding of how to put a border around text in Google Docs. If you enjoyed this article, you might also like our article on how to remove highlighted text in Google Docs or our article on how to change text orientation in Google Docs.